Handbag Quality Guide
How to Check Handbag Stitching Quality Before You Buy
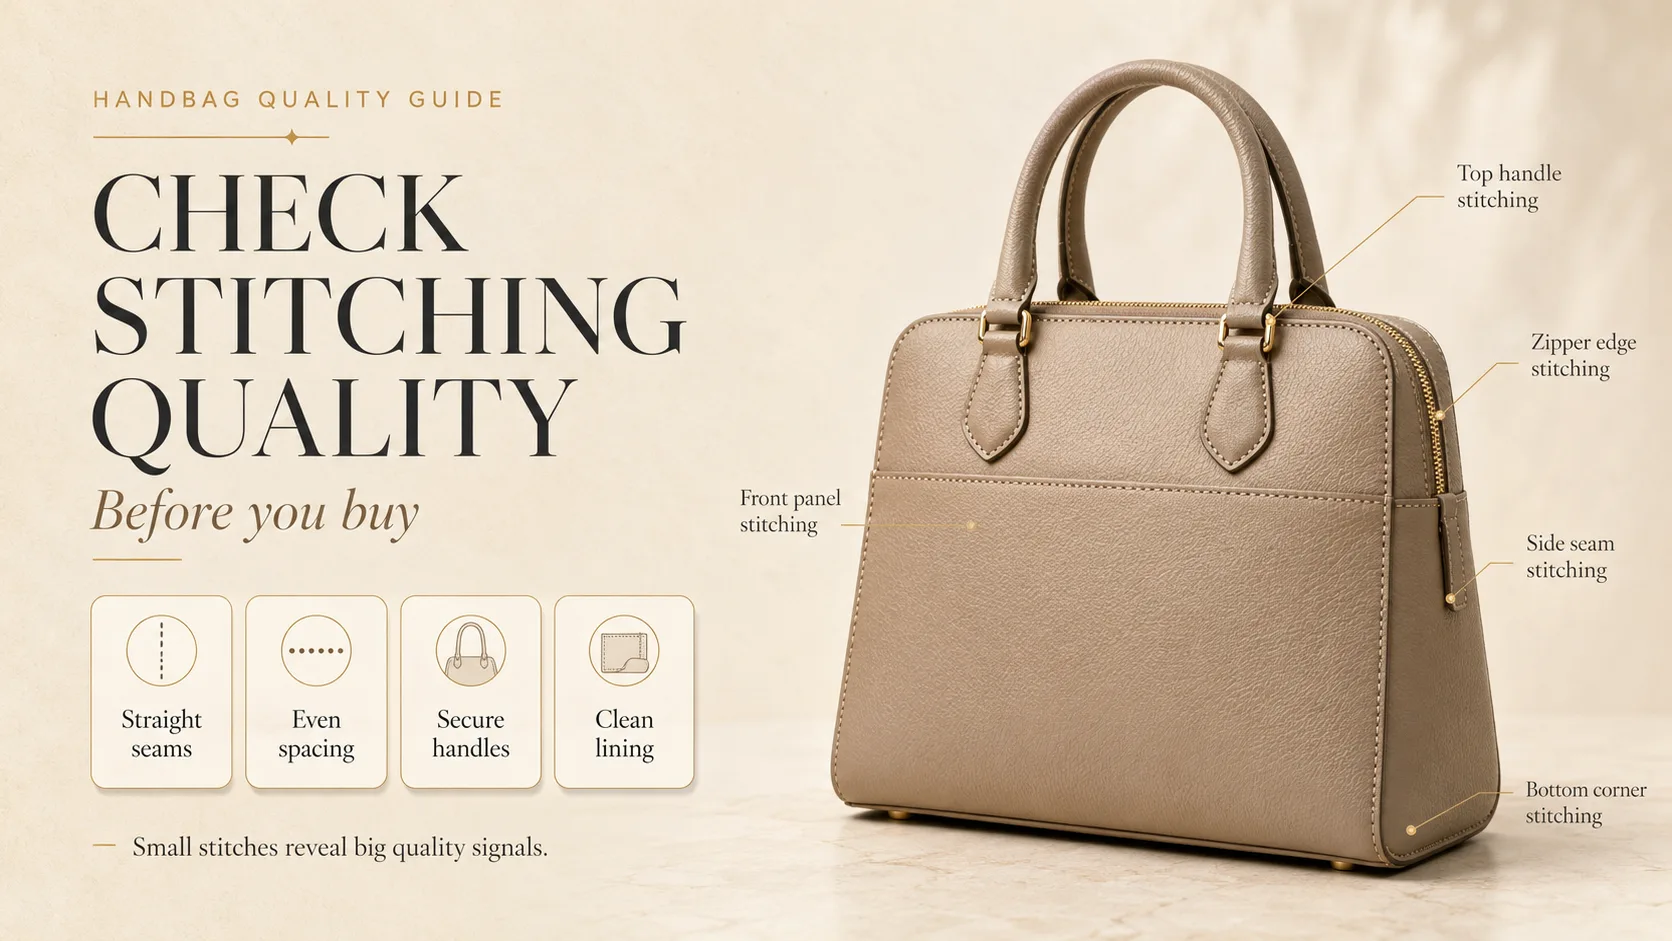
Handbag stitching is one of the easiest quality signals you can inspect before buying a bag. A handbag may look beautiful from a distance, but weak stitching often reveals poor construction around the areas that carry real pressure: handles, strap tabs, zipper ends, lining pockets, side seams, and bottom corners.
This guide explains how to check handbag stitching quality in a practical way before purchase. The goal is not to judge every bag by one fixed rule, because leather, canvas, nylon, satin, structured totes, soft shoulder bags, and travel totes need different construction choices. Instead, focus on clean alignment, consistent spacing, balanced thread tension, secure stress points, and a neat interior finish.
If you are comparing everyday structured styles, this checklist is especially useful before choosing a structured satchel bag for women, a medium tote, or a compact crossbody bag. Stitching will not tell you everything, but it can quickly show whether the bag was finished with care.
Why Stitching Quality Matters in a Handbag
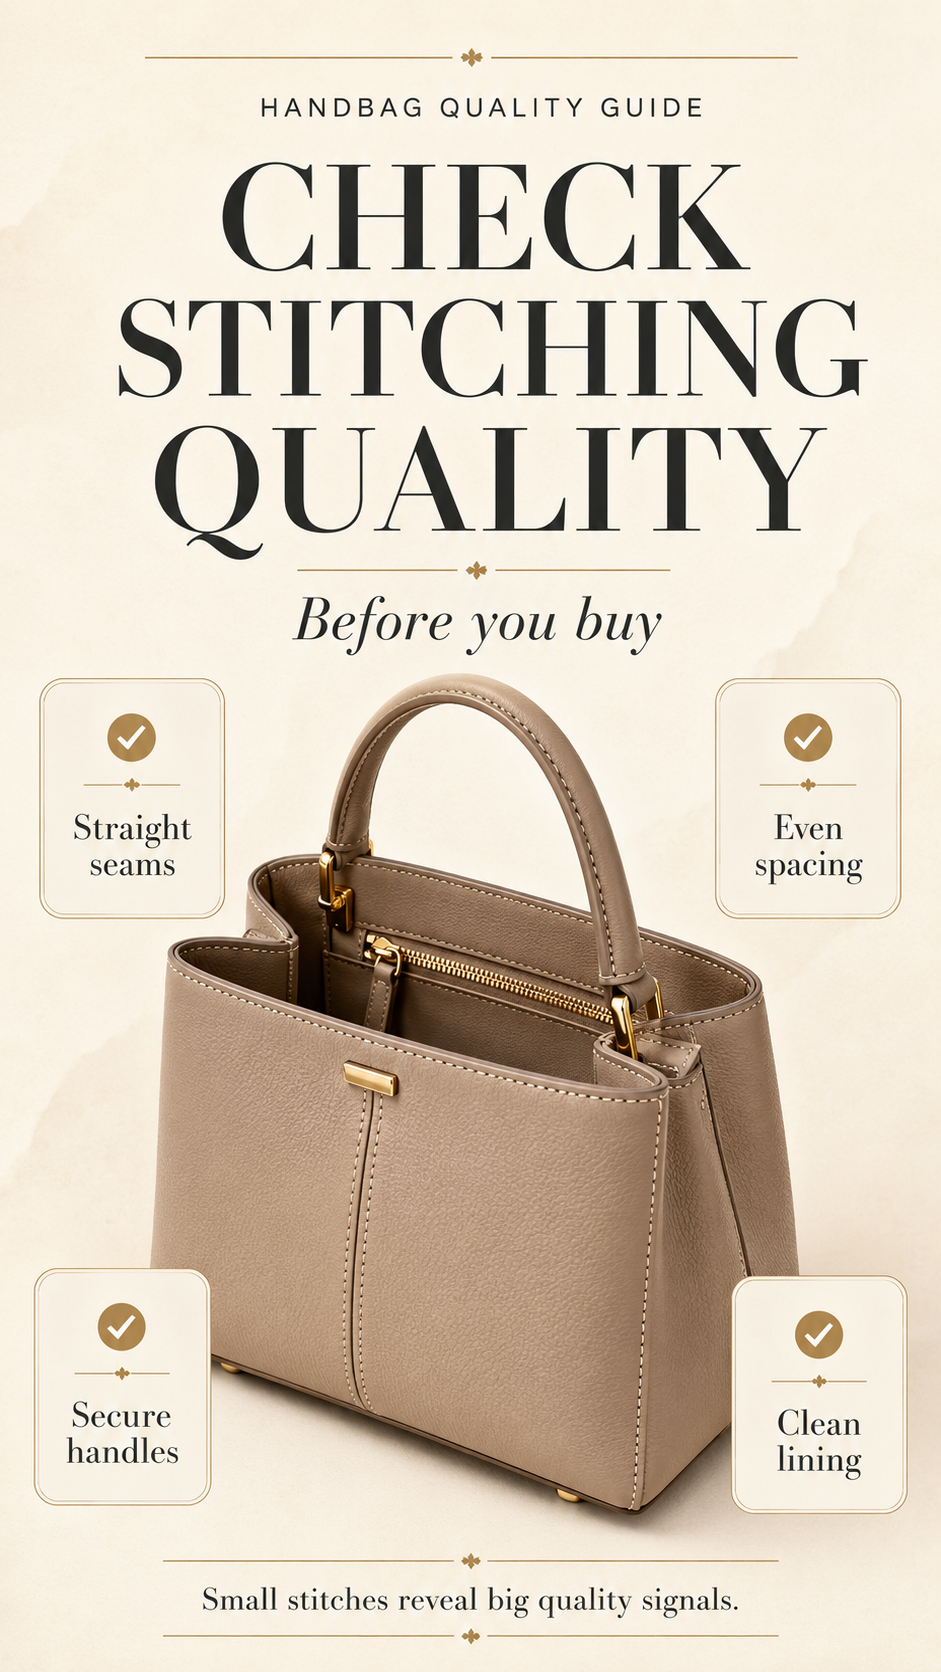
Stitching is not only decorative. It holds the bag’s panels, straps, pockets, zipper tape, lining, and handles together. On a structured tote or satchel, the seams help the bag carry weight and keep its shape. On a soft fabric bag, stitching also helps protect the fabric edges from fraying and separating during daily use.
A weak seam usually fails slowly before it fails suddenly. First, the thread becomes loose. Then the seam may begin to open under pressure. After that, the surrounding material and stitch holes take more stress than they should. That is why stitching deserves attention before you spend money on a handbag.
This matters even more on bags designed for daily use. For example, a practical satchel such as the LOVEVOOK satchel bag, a structured faux leather design like the COCIFER women’s satchel bag, or an office-ready silhouette such as the ALDO Legoiri bag should always be inspected around the handles, zipper area, and side seams before buying.
First Look: Is the Stitching Straight and Even?
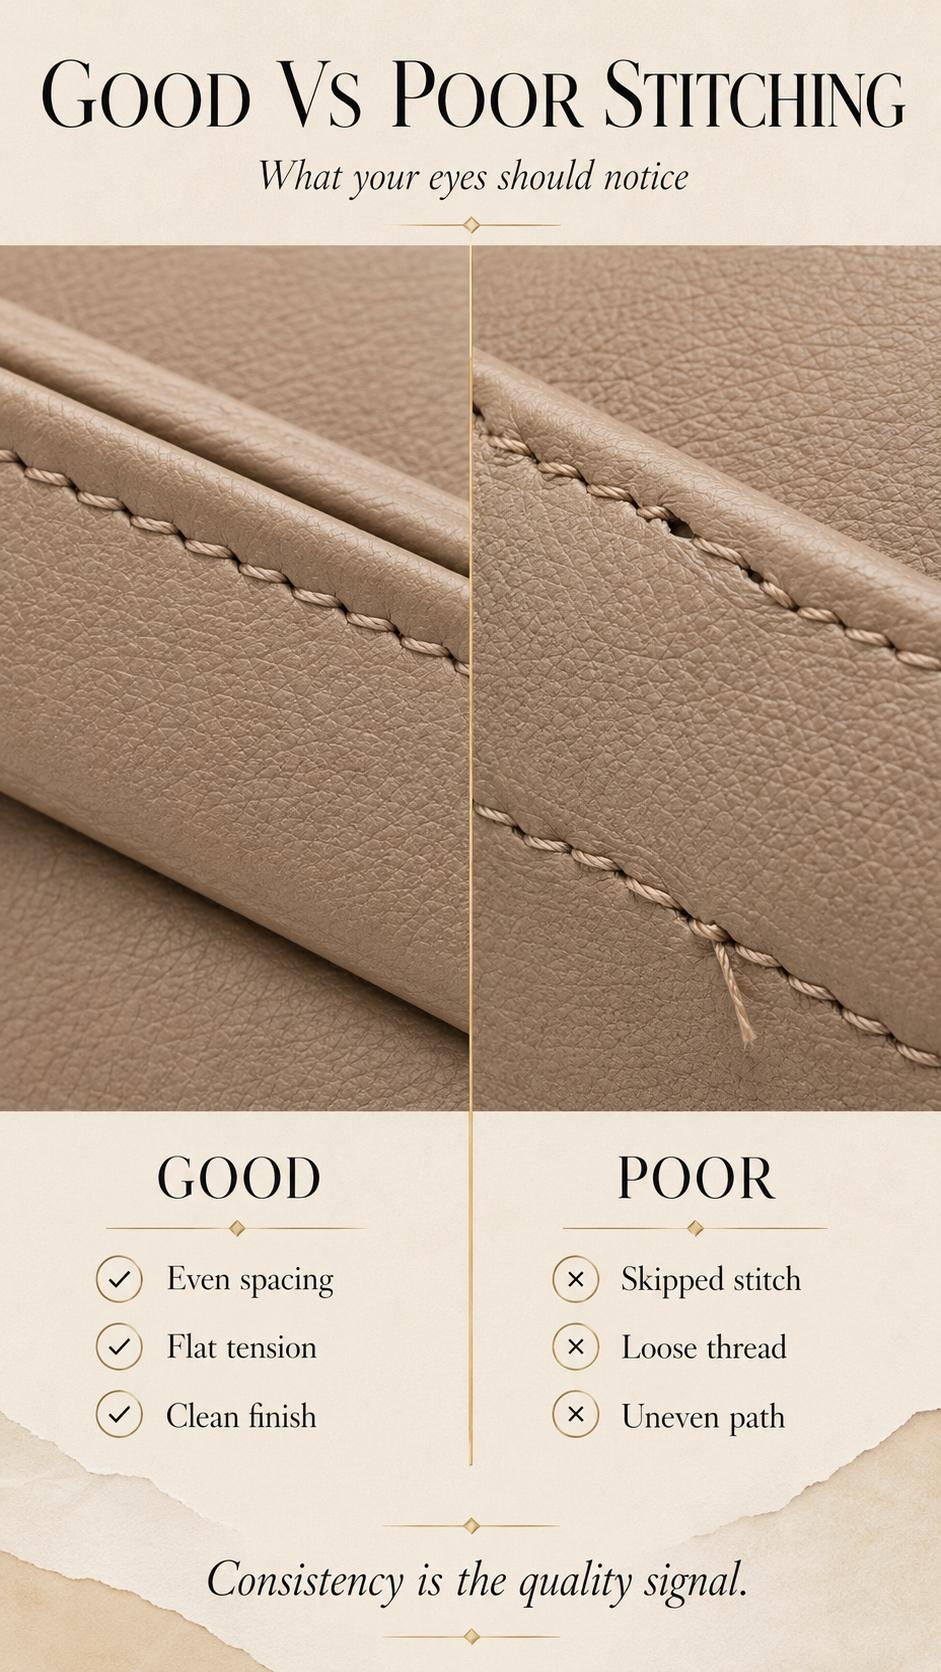
Start with the most visible exterior seams. Hold the handbag under good light and follow the stitch line with your eyes. The seam should run in a controlled path and stay parallel to the edge of the leather or fabric. On a well-made bag, the stitch line usually looks intentional, not rushed, wavy, or randomly drifting.
Even stitching does not mean every handmade bag must look machine-perfect. Some traditional leather stitching can have a natural angled rhythm. That can be acceptable when the rhythm is consistent. What you should avoid is random unevenness: short and long stitches mixed together, crooked paths, skipped holes, or a stitch line that moves closer and farther from the edge without purpose.
When you inspect a polished satchel like the Calvin Klein Millie Triple Compartment Satchel or a compact top-handle style like the ALDO Elera Mini Top Handle Satchel, follow the stitching around the front panel, handle roots, and zipper opening. These visible areas should look clean before you check the interior.
- Straight stitch line
- Even spacing
- No random curves
- No skipped stitch areas
Check the Stitch Length and Spacing
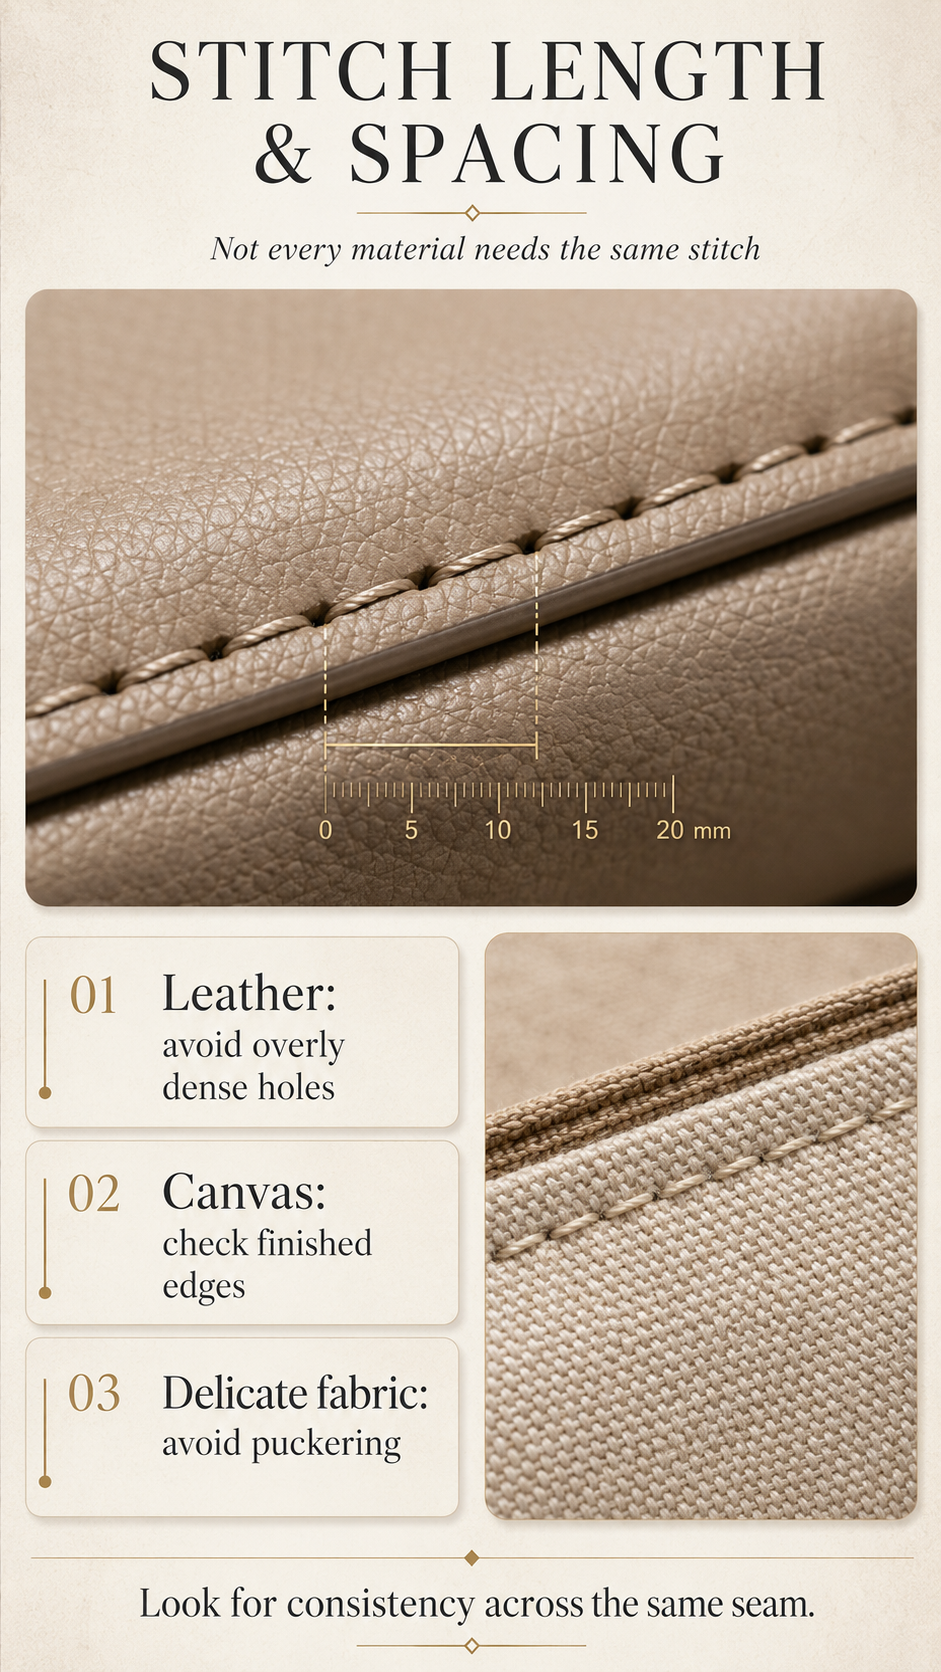
Stitch length and spacing affect both appearance and strength. A seam with very long, loose stitches may open under pressure. But stitching that is too dense can also be a problem on leather because the needle holes can create a weak perforation line. This is why leather bags, fabric bags, and delicate evening bags should not be judged by one universal stitch count.
As a buyer, you do not need a factory gauge. Pick one straight section of the seam and compare the stitches across the same line. The stitches should look similar in length and distance. If one area has tight, cramped stitches and another area has long, loose stitches, the sewing may have been poorly controlled.
This is also why material context matters. A roomy fabric or canvas design, such as the Roven Canvas Travel Satchel Bag, should be checked differently from a polished faux leather satchel like the Simyeer Satchel Bag for Women. Canvas needs secure finished edges, while structured leather-look bags need clean stress-point stitching and controlled tension.
| Material / Bag Type | What Good Stitching Should Suggest | What to Avoid |
|---|---|---|
| Structured leather tote or satchel | Controlled spacing, strong thread, secure stress points. | Overly dense holes, loose handle stitches, or visible seam gaps. |
| Canvas, denim, or twill bag | Consistent stitching with finished or enclosed raw edges inside. | Raw fraying edges, loose seams, or long stitch gaps. |
| Nylon or sport bag | Strong stitching around webbing, strap roots, zipper areas, and load points. | Weak strap reinforcement, loose loops near hardware, or poor bar-tack areas. |
| Silk, satin, or evening bag | Fine, neat stitching with smooth tension. | Puckering, visible needle damage, or heavy thread that distorts delicate fabric. |
Look for Loose Threads or Unfinished Ends
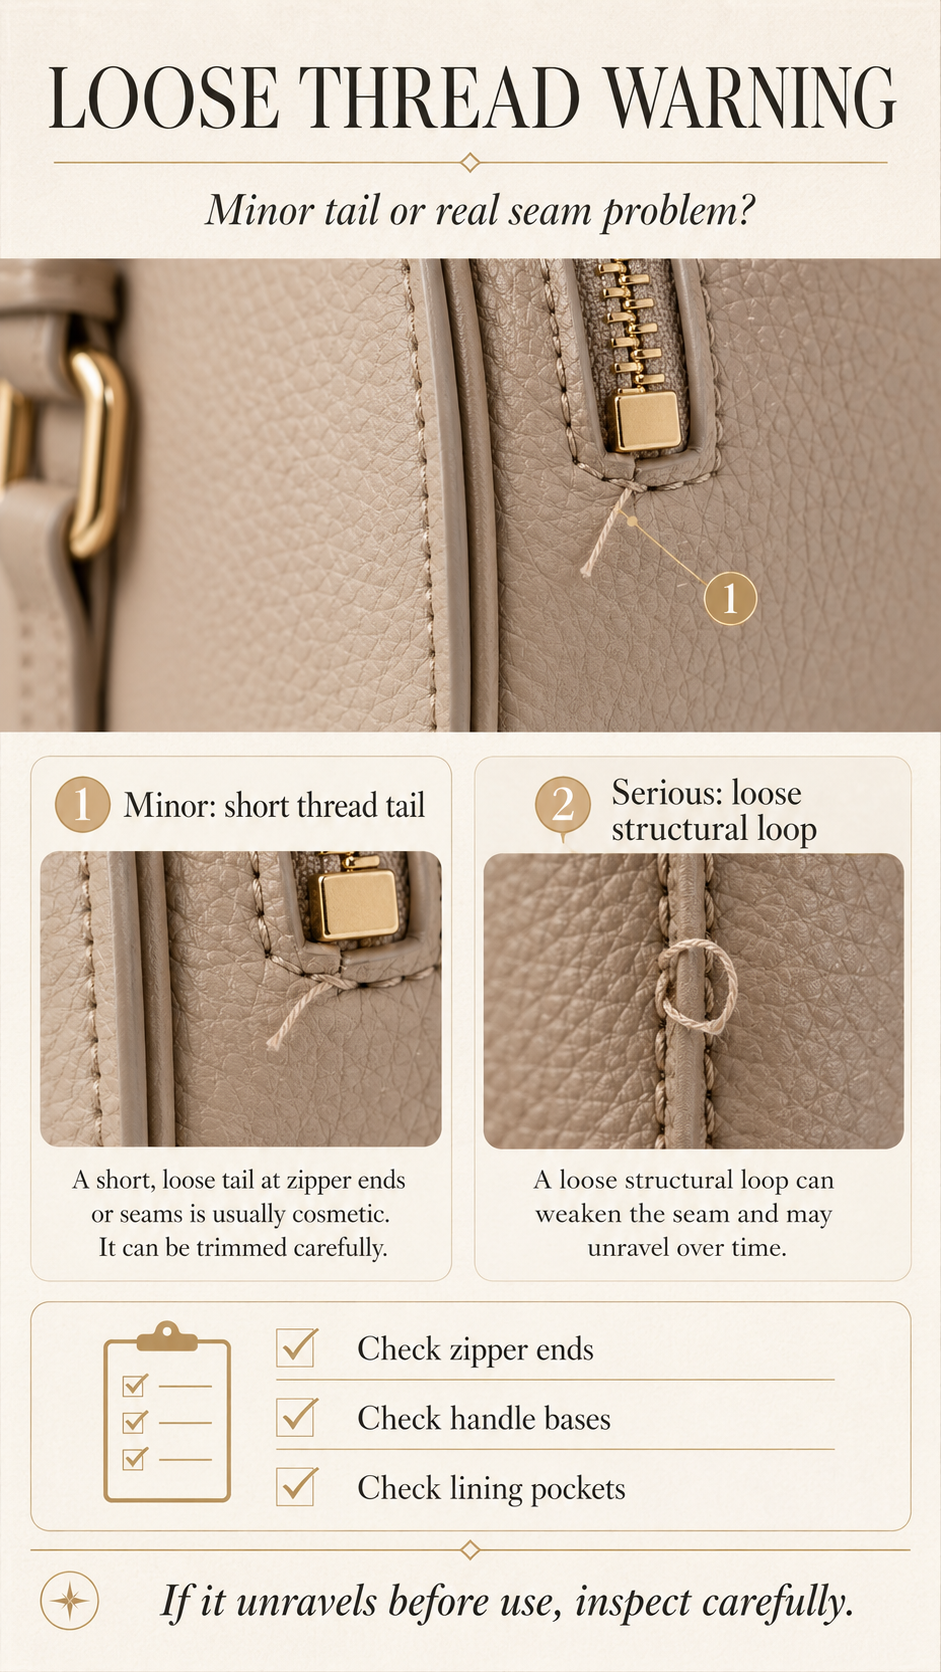
Loose threads on a new handbag deserve attention because they can show whether the seam was properly finished. A single short thread tail inside the lining may be only a minor finishing issue if the seam itself is locked and secure. But loose loops, messy knots, skipped stitches, and unfinished seam ends are more serious.
Look closely at zipper ends, pocket corners, handle bases, side seams, and the underside of the lining. Thread ends should be neatly trimmed, tucked, secured, or finished in a way that does not easily catch on keys, zippers, jewelry, or clothing. If the thread already looks fuzzy, frayed, or pulled out before the bag has been used, the bag may age poorly with daily carry.
This is important for both compact bags and larger bags. A small hobo such as the WantGor Noire Small Hobo Bag should still have clean strap and top-edge finishing, while a larger hobo like the Realer Bruna Large Faux Leather Hobo Bag needs strong seams because the bag body carries more volume.
Buyer warning: If loose threads appear before use, inspect the surrounding seam carefully. A harmless extra thread can be clipped, but a loose structural stitch can unravel with normal movement and weight.
Inspect the Handle and Strap Stitching
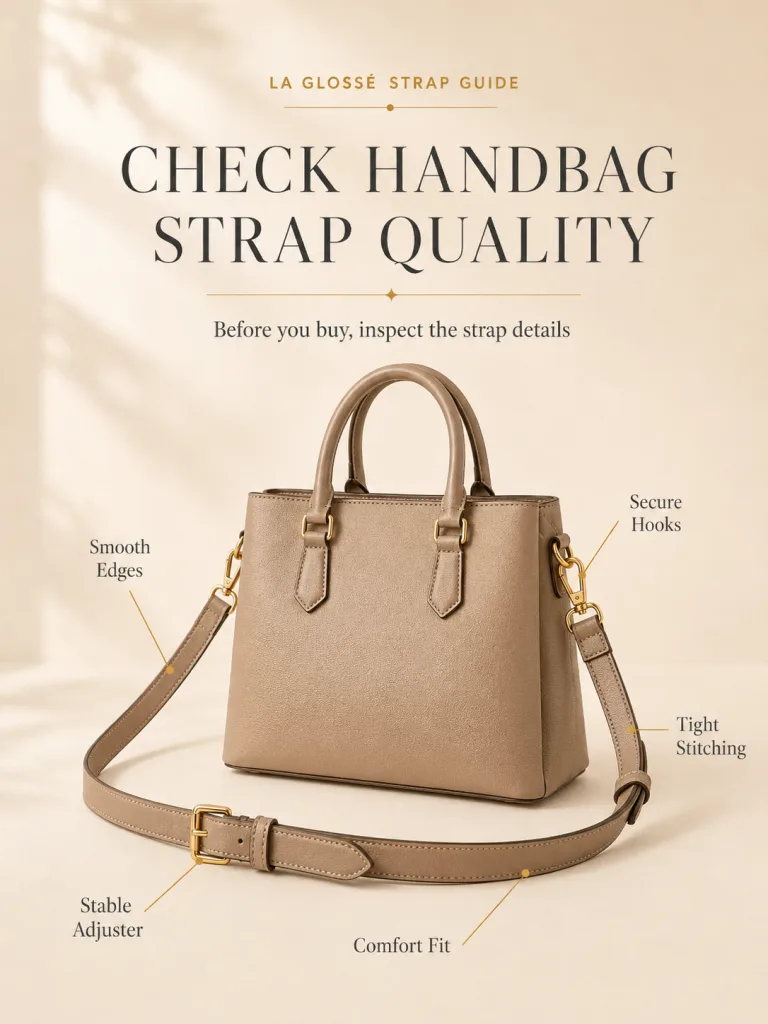
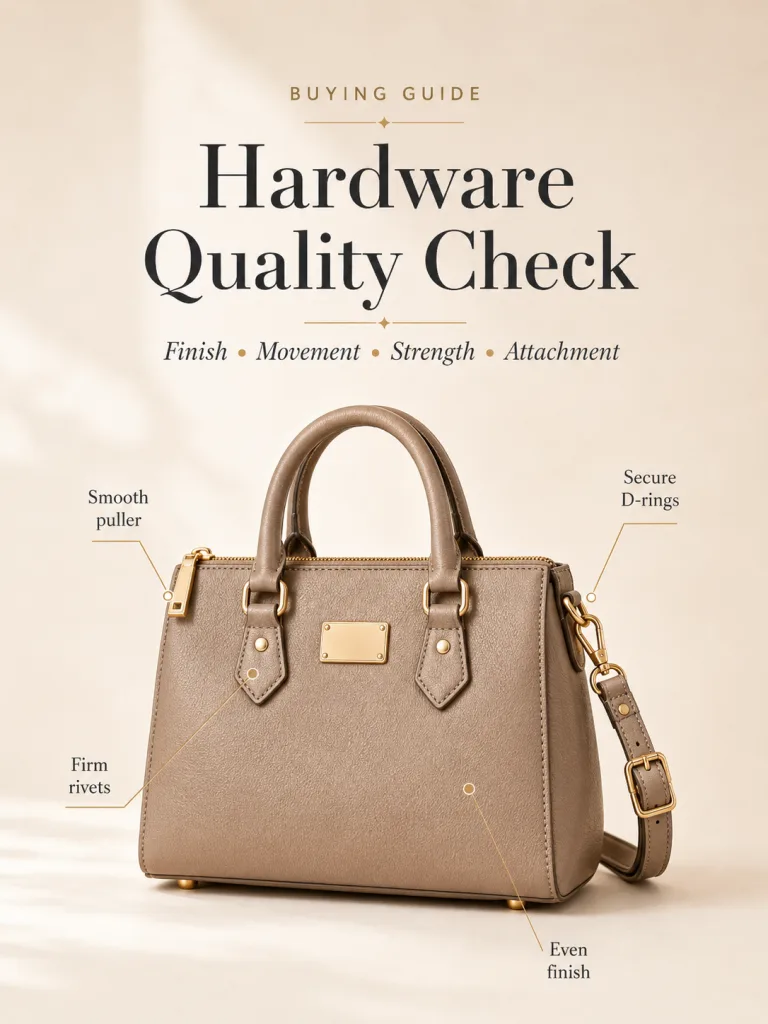
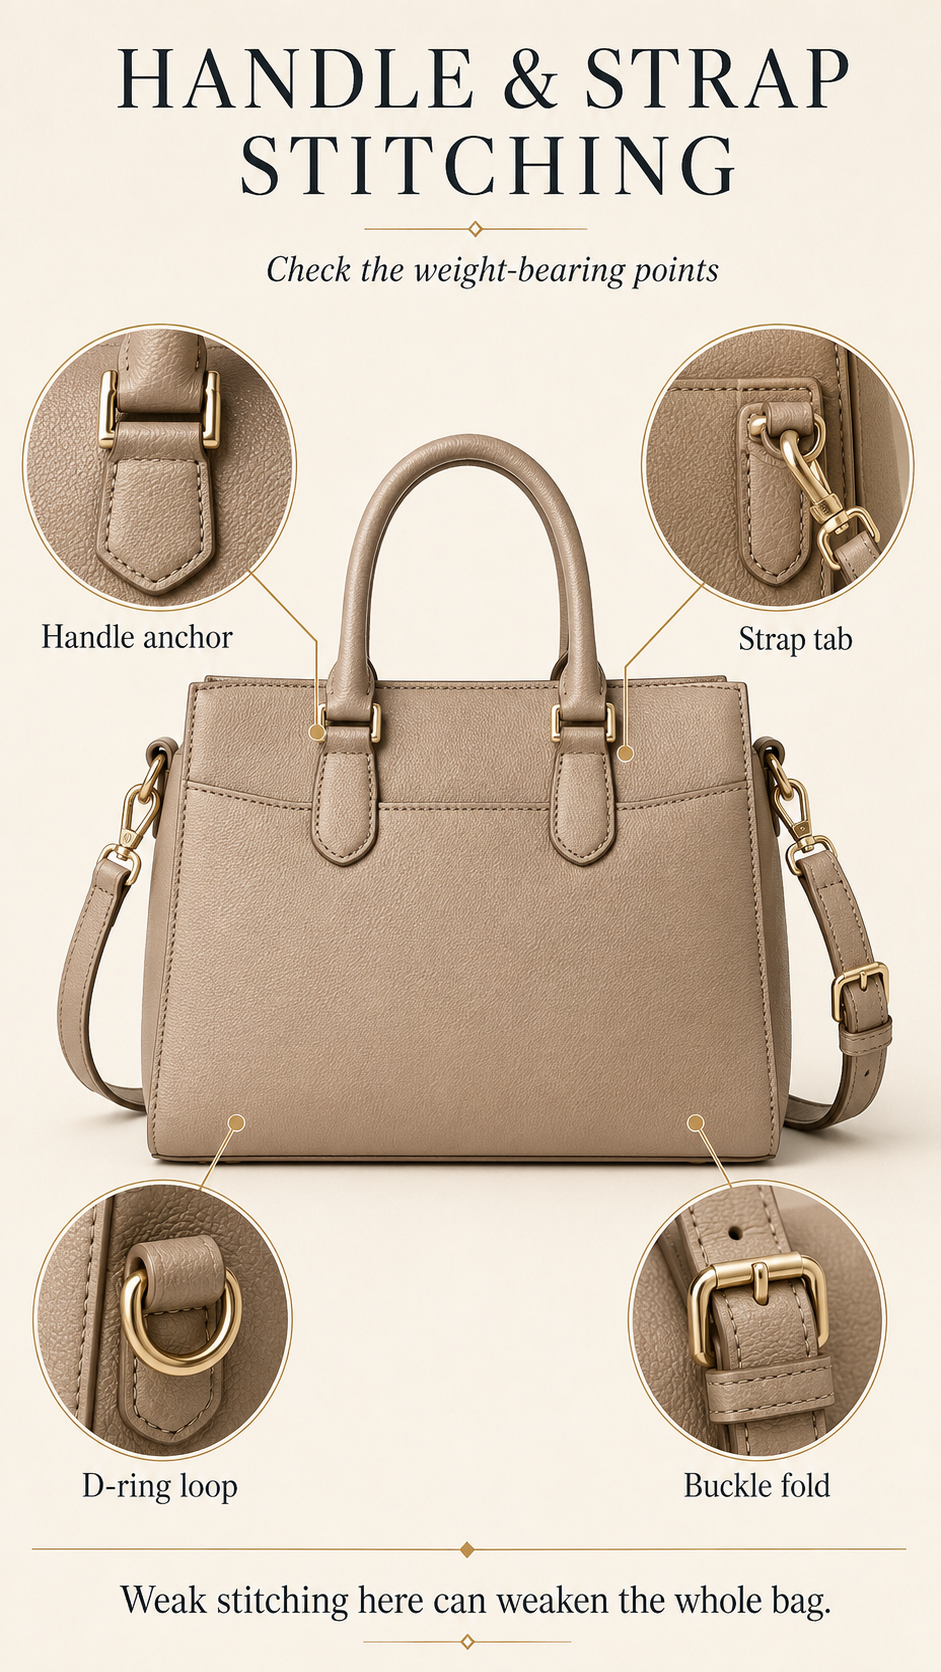
Handle and strap stitching is one of the most important parts of a handbag inspection. Handles and straps carry the bag’s weight, so the attachment points must be stronger than ordinary decorative seams. Look closely where the top handle, shoulder strap, crossbody tab, D-ring tab, buckle fold, or chain loop meets the bag body.
Good construction often uses reinforced stitch patterns, repeated backstitching, double rows, box stitching, or bar-tack-style reinforcement depending on the bag type. The important point is not the name of the stitch pattern alone. The attachment should look secure, flat, and supported. If the strap is held by one weak row of loose thread, it may stretch, tear, or pull away when the bag is loaded.
For crossbody styles, this step is essential. A small bag such as the Calvin Klein Bianca Crossbody or a travel-focused style like the Travelon Vera Crossbody Utility Bag depends heavily on strap tabs, clips, and side attachment points. If those areas look weak, the rest of the bag’s appearance matters less.
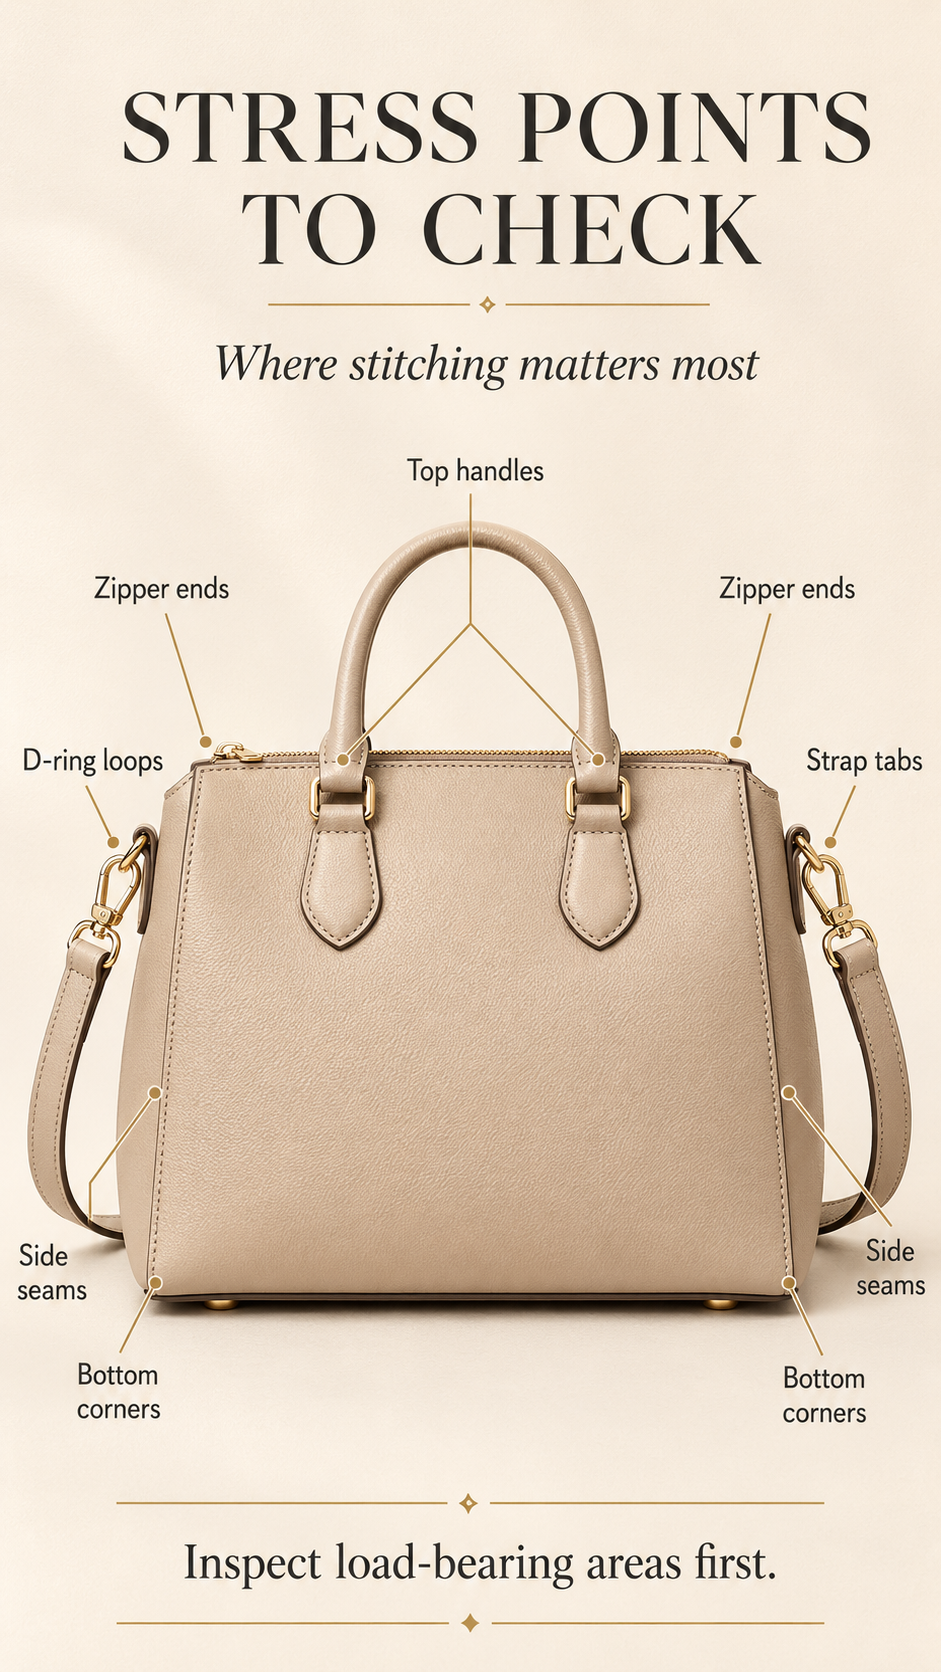
Stress Point Areas to Check
- Top handles: Check whether the handle base is tightly secured and does not lift away from the bag body.
- Shoulder strap tabs: Look for dense stitching and no stretching around the tab base.
- Crossbody D-ring tabs: Check the loop that holds the metal ring; it should not twist loosely or gap.
- Buckle connection areas: Inspect folded material near buckles for secure stitching, rivets, or reinforcement.
- Side panels: Check whether the panel seams stay closed when the bag is gently filled or lightly pulled.
Check Corner Stitching and Bottom Seams
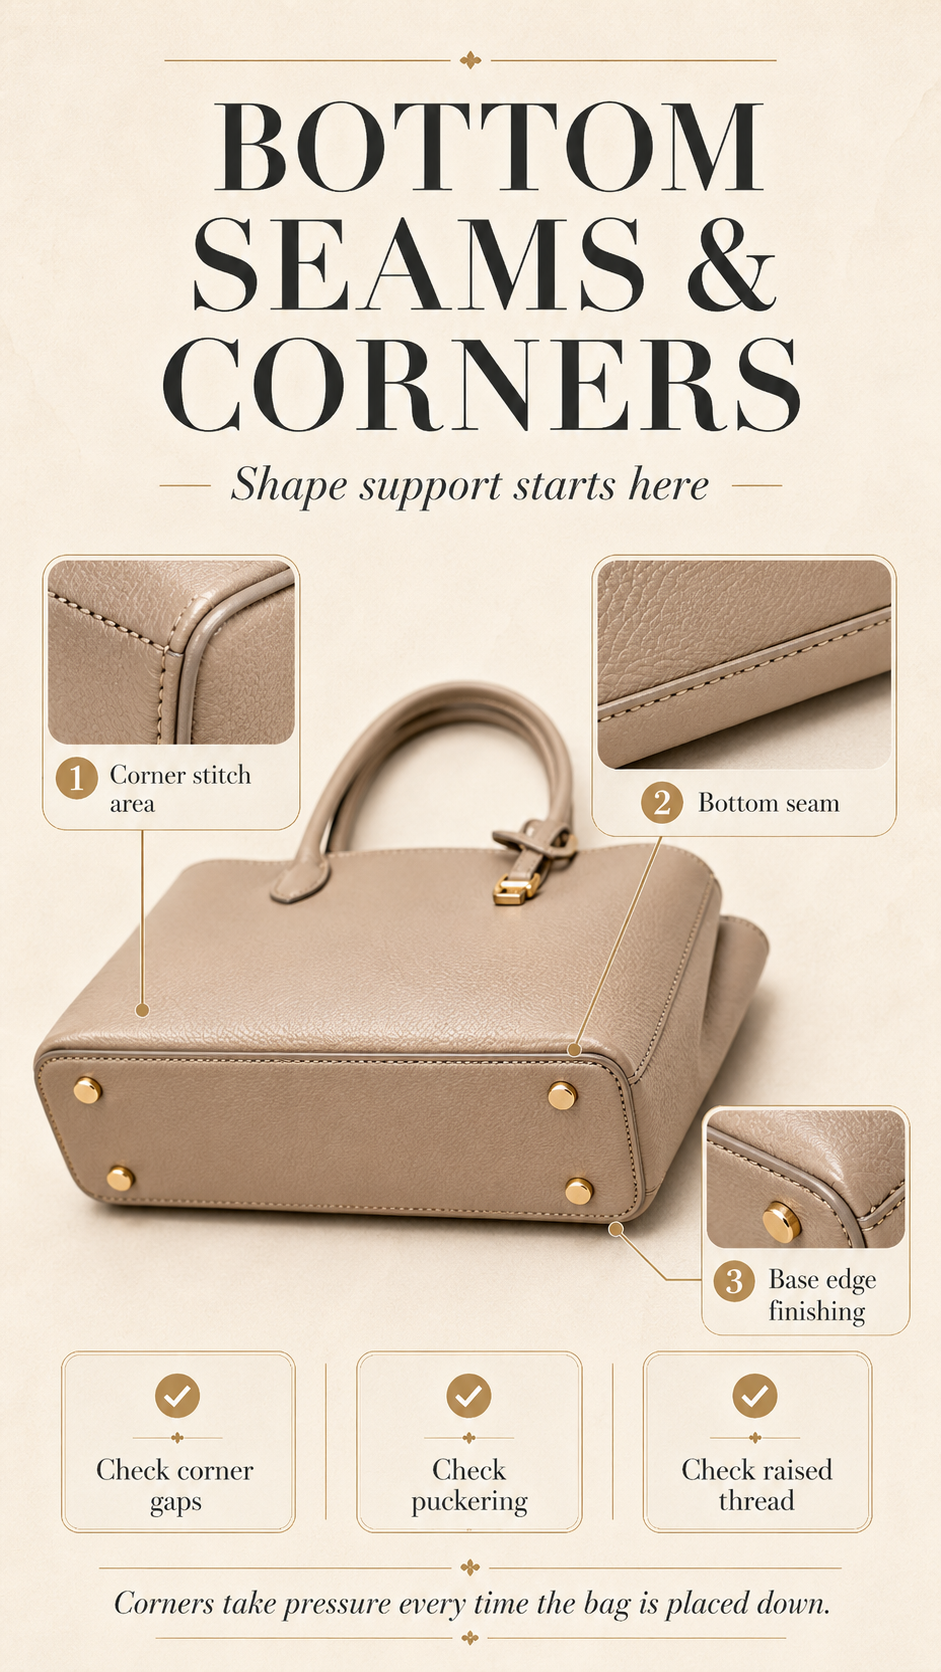
Bottom corners take pressure whenever the bag is filled, placed down, lifted, or moved across surfaces. On structured handbags, the bottom seams also help the bag hold its shape. If those seams stretch or gap, the base can begin to sag, twist, or lose structure.
Flip the bag over and inspect the base. Good corner stitching should look tight, clean, and controlled. The thread should sit flat without exposed loops. Avoid puckering, gaps, pulled thread, or uneven seam tension. Also check whether the base has protective feet. Even when feet are present, the corner stitching still needs to be clean because the corners carry expansion pressure from inside the bag.
This is especially relevant for tote sets and travel-ready bags. A structured tote like the Montana West Orange Tote Set or a weekender-style bag such as the Rosela Buffalo Weekender Tote Bag should be checked around base seams and lower corners because those areas take pressure when the bag is full.
Examine the Zipper Area Stitching
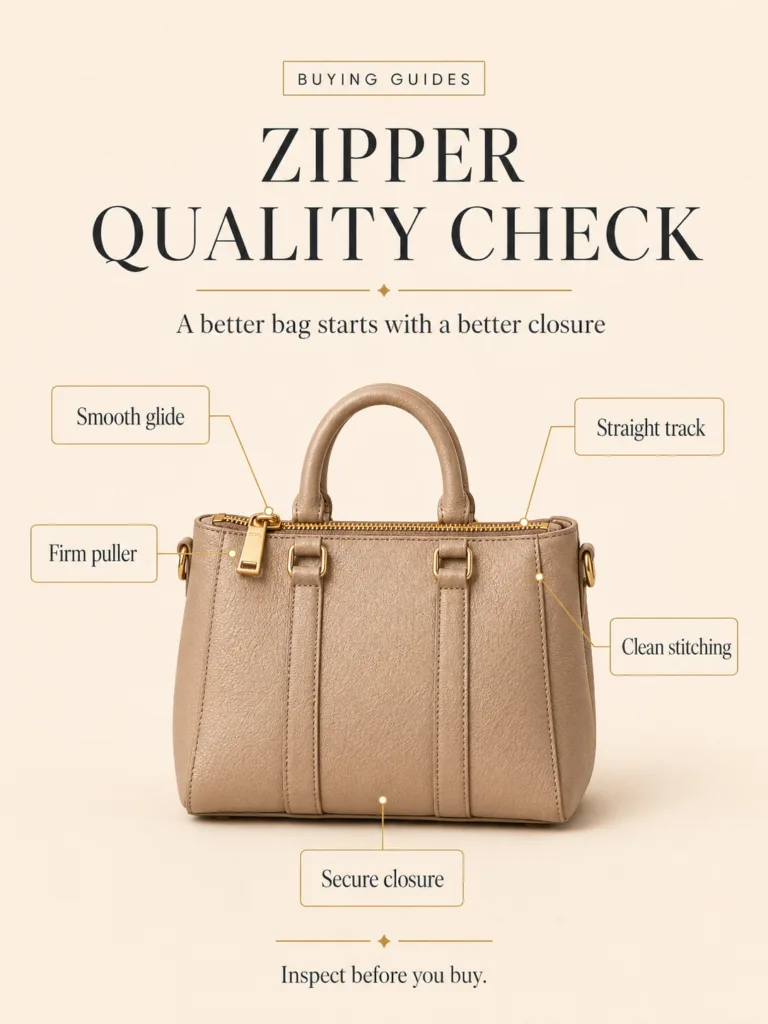
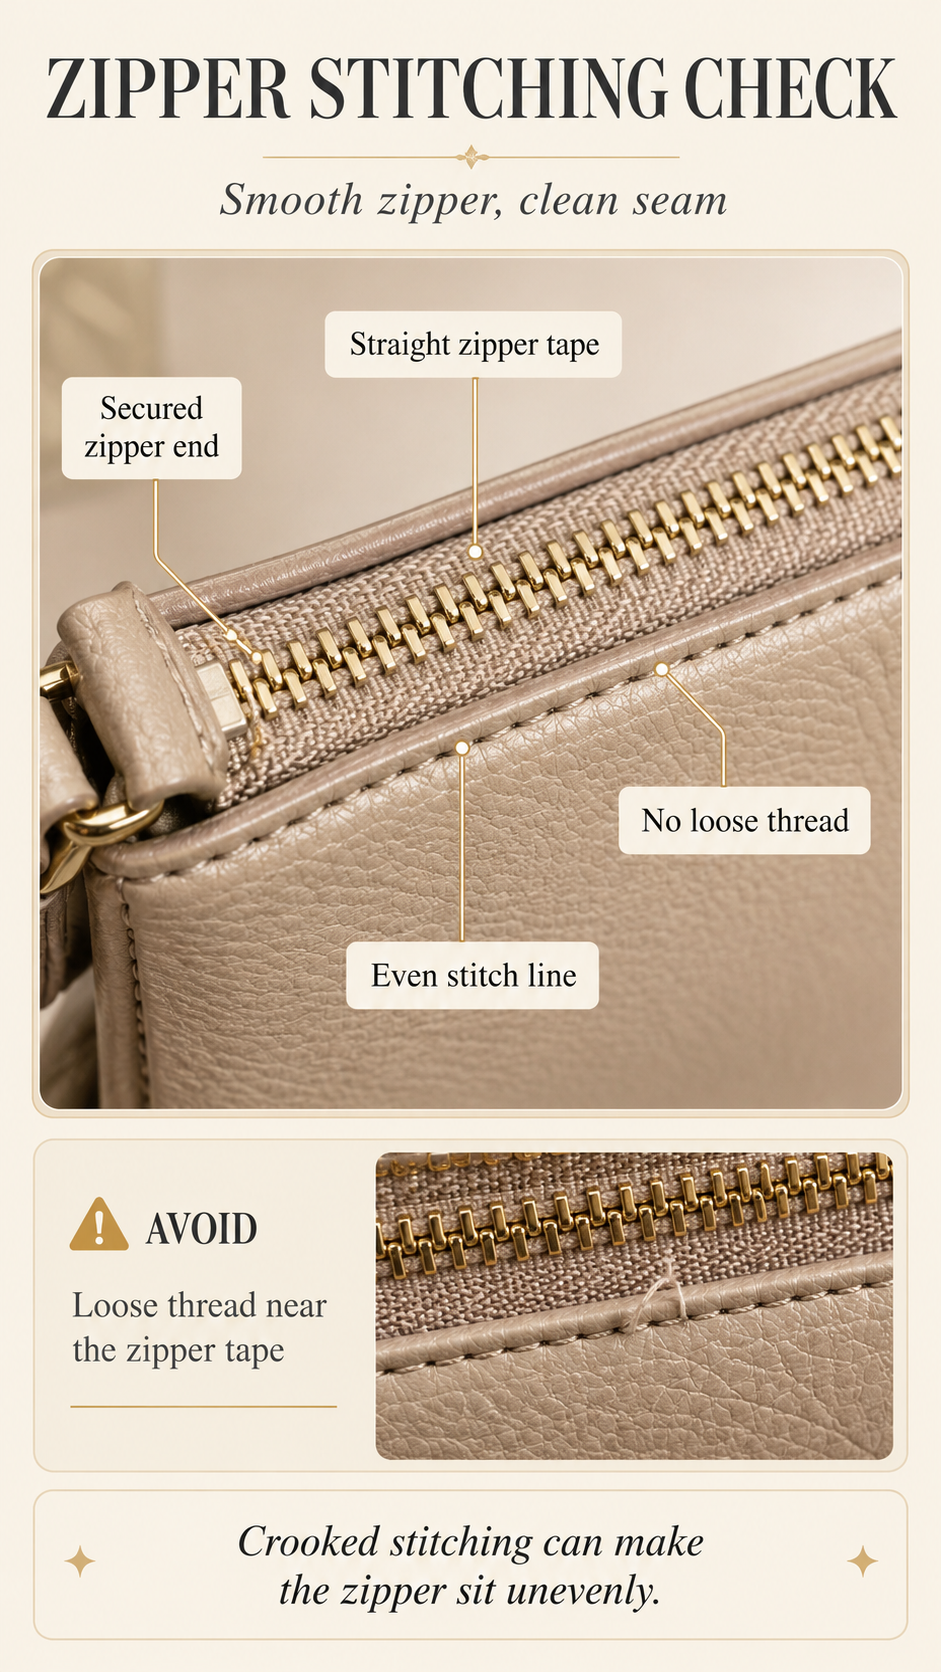
Zipper stitching should be straight, secure, and close enough to support the zipper tape without interfering with the zipper teeth. If the stitch line is crooked, the zipper tape may sit unevenly. That can make the slider catch, wave, or feel rough during opening and closing.
Run the zipper slowly from end to end. Watch whether the zipper tape pulls, twists, or puckers as the slider moves. No loose thread should block the zipper path. The zipper ends should be neatly secured because those points take repeated pulling force every time the bag is opened or closed.
If you like multi-compartment bags, zipper stitching becomes even more important. A bag such as the Tantomi Lunera Three-Piece Handbag Set or a compact triple-zip crossbody like the Alyssa Vera Triple Zip Crossbody Bag has more zipper zones to inspect, so check each zipper tape line instead of only the main opening.
Don’t Forget Interior Lining Stitching
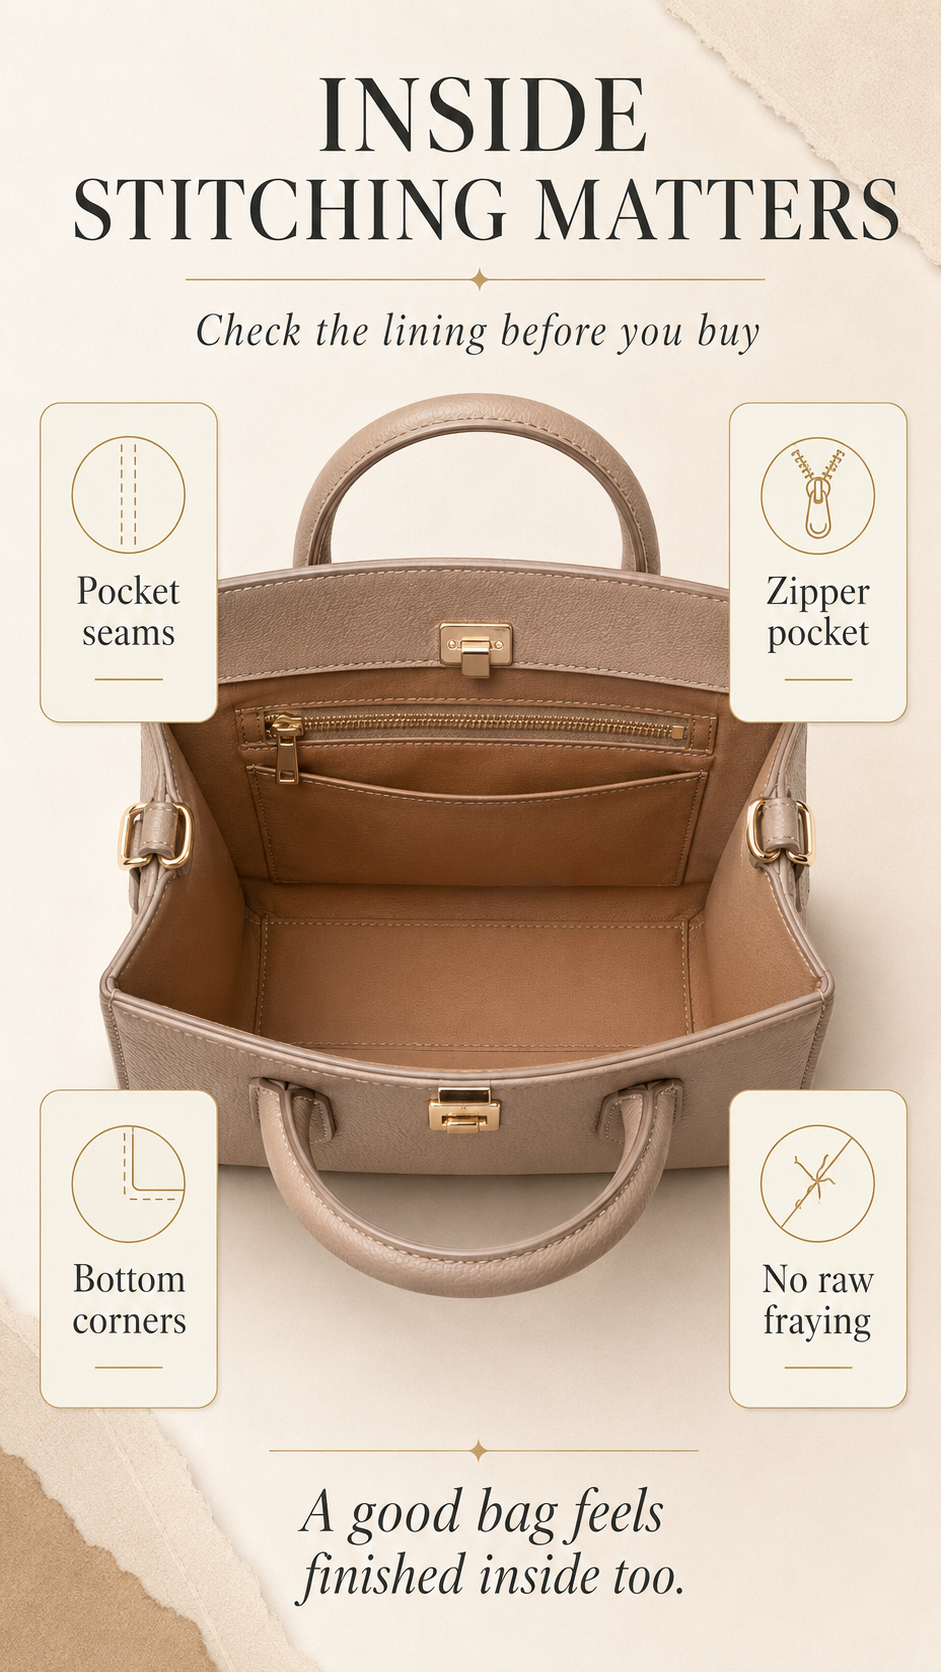
The inside of a handbag matters as much as the outside. Many buyers inspect the exterior material, hardware, and overall shape first, but weak lining stitching can make a bag frustrating to use. Interior pockets, zipper pockets, divider panels, and lining corners face constant friction from keys, pens, cards, makeup, and phones.
Open the bag fully and check whether the lining seams are neat. Woven lining fabrics should not have raw fuzzy edges that can fray easily. Pocket corners should feel secure because they are pulled every time you place or remove items. If the lining turns inside out too easily, bunches near the zipper, or has loose pocket seams, the bag may feel messy during daily use even if the outside looks polished.
For a deeper interior check, read Bag Lining Explained. Stitching and lining quality work together: a bag can have a beautiful exterior, but if the lining pocket seams are weak, the daily experience will still feel cheap.
Check Thread Tension
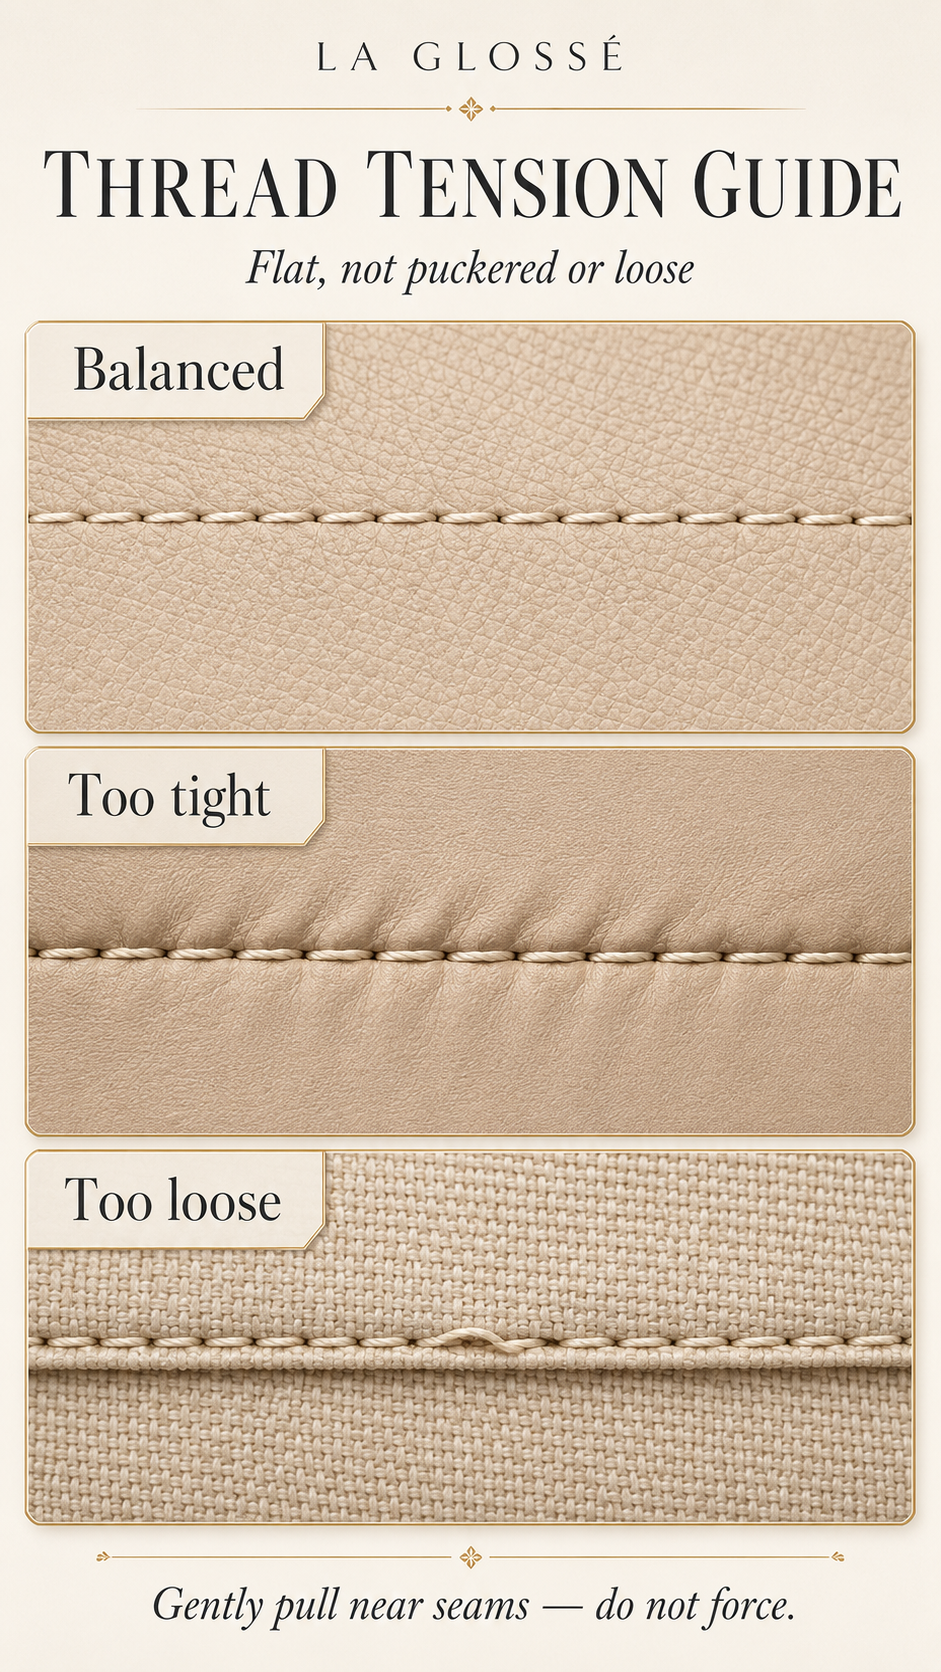
Thread tension tells you whether the stitch is sitting correctly in the material. A balanced seam should look flat and controlled. The thread should not be so tight that it puckers the leather or fabric, and it should not be so loose that loops rise above the surface.
Use a gentle pull test. Hold the two panels near a seam and apply light outward pressure. Do not force it. If the panels open easily and you can see vertical thread columns between the layers, the seam may have poor tension. A secure seam should remain closed under light inspection pressure.
This is useful when comparing soft and structured designs. A soft crossbody like the Minicat Soft Leather Crossbody Bag should flex without obvious seam gaps, while a structured bag like the Genuine Leather Satchel Bag should keep clean, closed seams around its more rigid shape.
| Tension Sign | What You See | Why It Matters |
|---|---|---|
| Balanced tension | Thread sits flat, seam remains closed, no wrinkling. | Good sign for everyday durability. |
| Too tight | Material puckers or wrinkles along the stitch line. | Can stress the fabric or leather before use. |
| Too loose | Loops, gaps, or seam opening appears when lightly pulled. | Can lead to gaps, snags, and unraveling. |
Match the Thread With the Bag Material
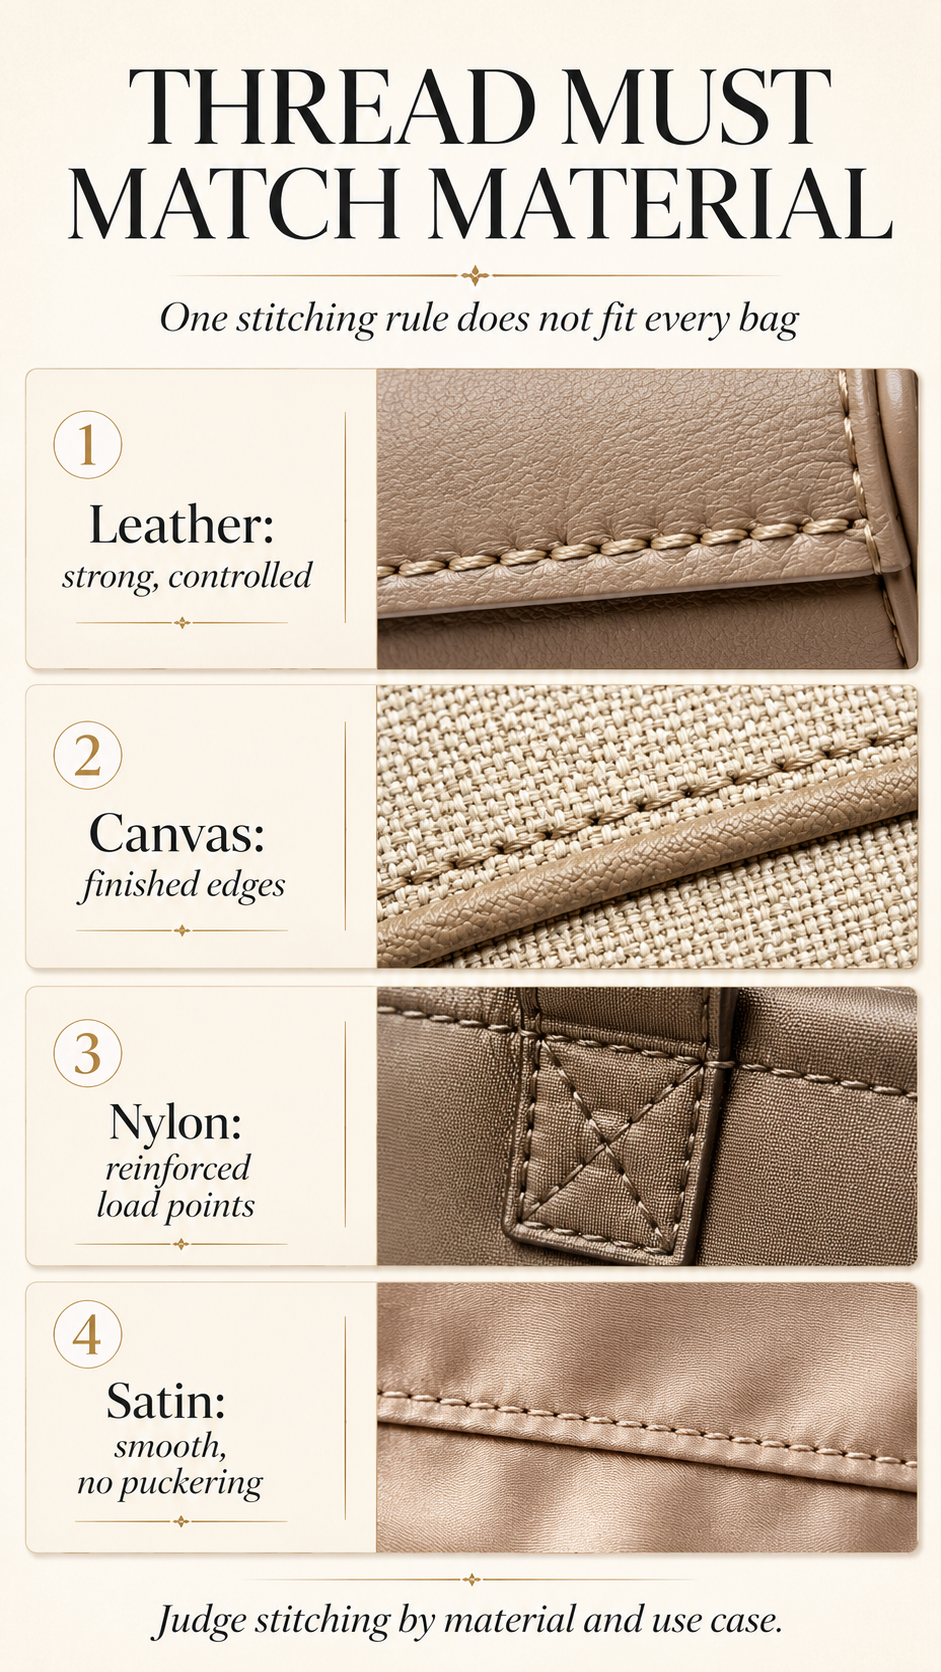
A trustworthy bag uses thread that suits the material and purpose. Thick structured leather needs a different approach from satin, canvas, or technical nylon. Heavy thread may look strong, but on delicate materials it can create visible holes or puckering. Very fine thread may look clean, but on a heavy tote or strap tab it may not provide enough support.
When buying, focus on compatibility. On leather, thread should look dense, controlled, and resistant to fraying. On canvas, internal edges should be finished so the fabric does not unravel. On nylon or sport bags, strap webbing and hardware loops need secure reinforcement. On evening bags, the stitching should be fine and smooth enough not to distort the fabric.
Material also changes the way a bag should be styled and judged. If you are comparing leather-look satchels, hobo bags, and everyday crossbodies, guides like Brown Purse vs Black Purse and Best Color Purse That Goes With Everything can help with color choice, but stitching should still be checked separately as a construction detail.
Common Signs of Poor Handbag Stitching
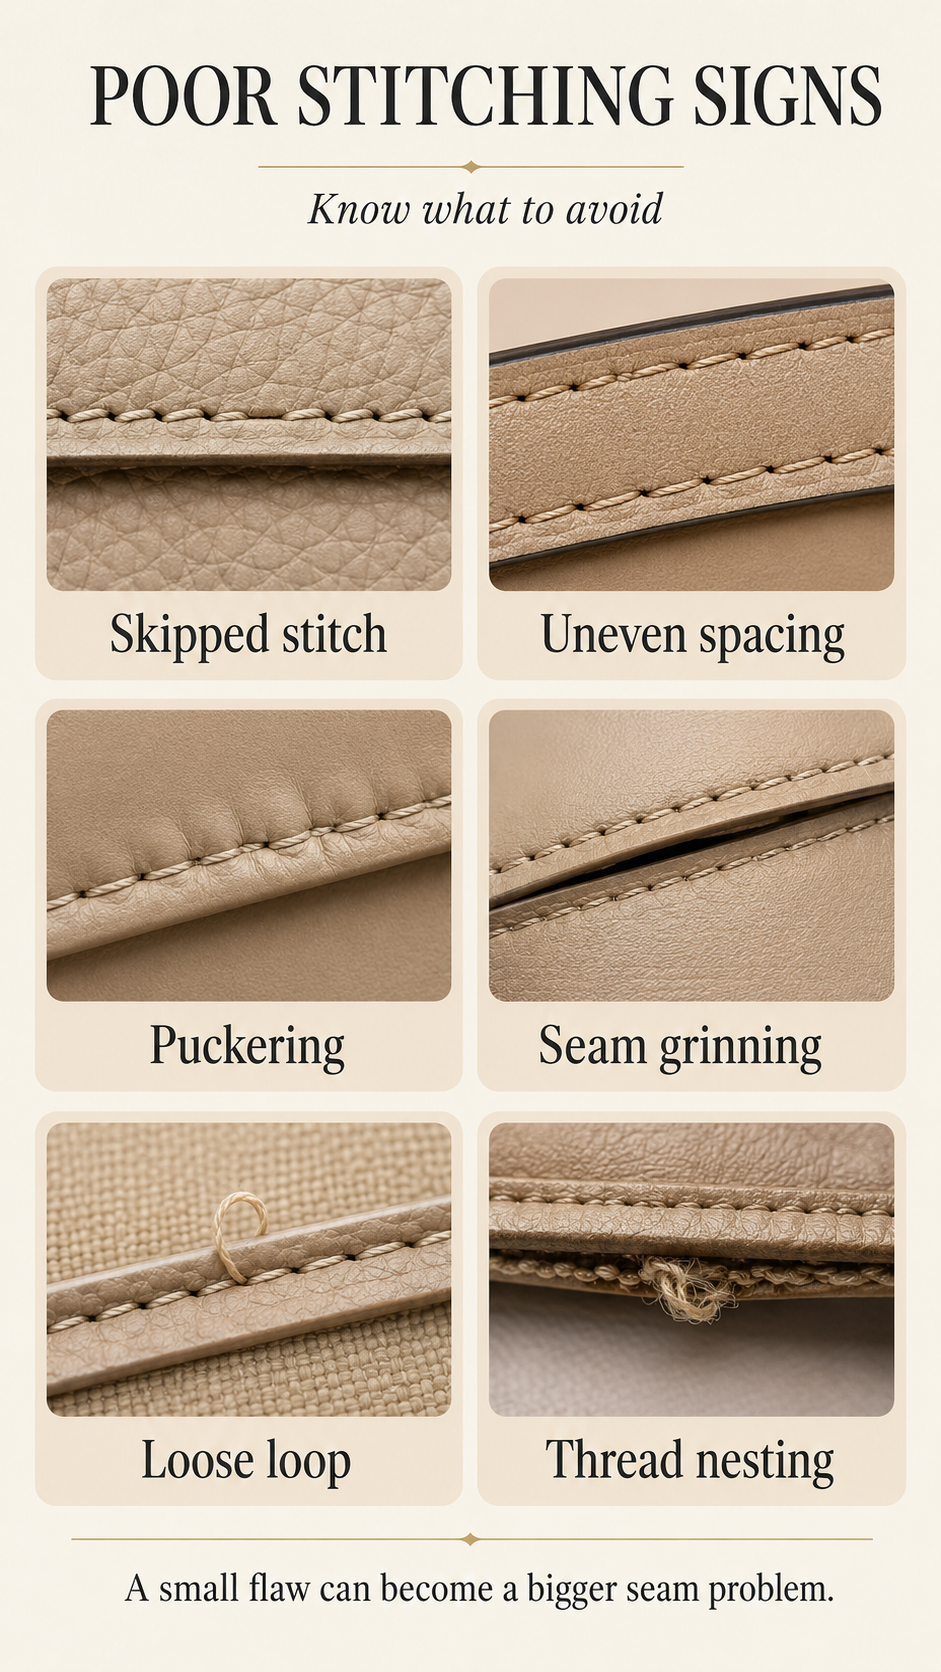
Poor stitching usually shows itself through visual defects or feel. Some flaws are cosmetic, but others can affect the structure of the bag. The most serious signs are skipped stitches, seam gaps, loose handle stitches, fraying before use, and stitches that appear to cut into the material.
These issues can appear on any price level. They may show up on a structured satchel, a quilted bag, a bucket bag, or a backpack. For example, when reviewing a sporty bag like the adidas Defender 5 Backpack, strap and zipper stitching deserve attention; when checking a quilted design like the Bostanten Quilted Cherry Crossbody Bag, pattern alignment and stitch consistency become more visible.
| Problem | What It Looks Like | Buyer Decision |
|---|---|---|
| Loose threads | Thread tails or loops hanging from seams. | Minor if only a trimmed tail; serious if structural thread is loose. |
| Uneven spacing | Short and long stitches mixed on the same seam. | Warning sign of rushed or inconsistent sewing. |
| Skipped stitches | Empty needle holes or thread floating over gaps. | Dealbreaker on exterior, straps, corners, or zipper areas. |
| Puckering | Wrinkled or gathered material along the seam. | Can show poor tension, especially serious on leather or satin. |
| Seam opening | Panels open and show thread columns when lightly pulled. | Strong warning sign; avoid on load-bearing seams. |
| Thread nesting | Tangled clumps of thread on the underside or inside lining. | Avoid if near structural seams or pockets. |
Quick 60-Second Handbag Stitching Inspection Method
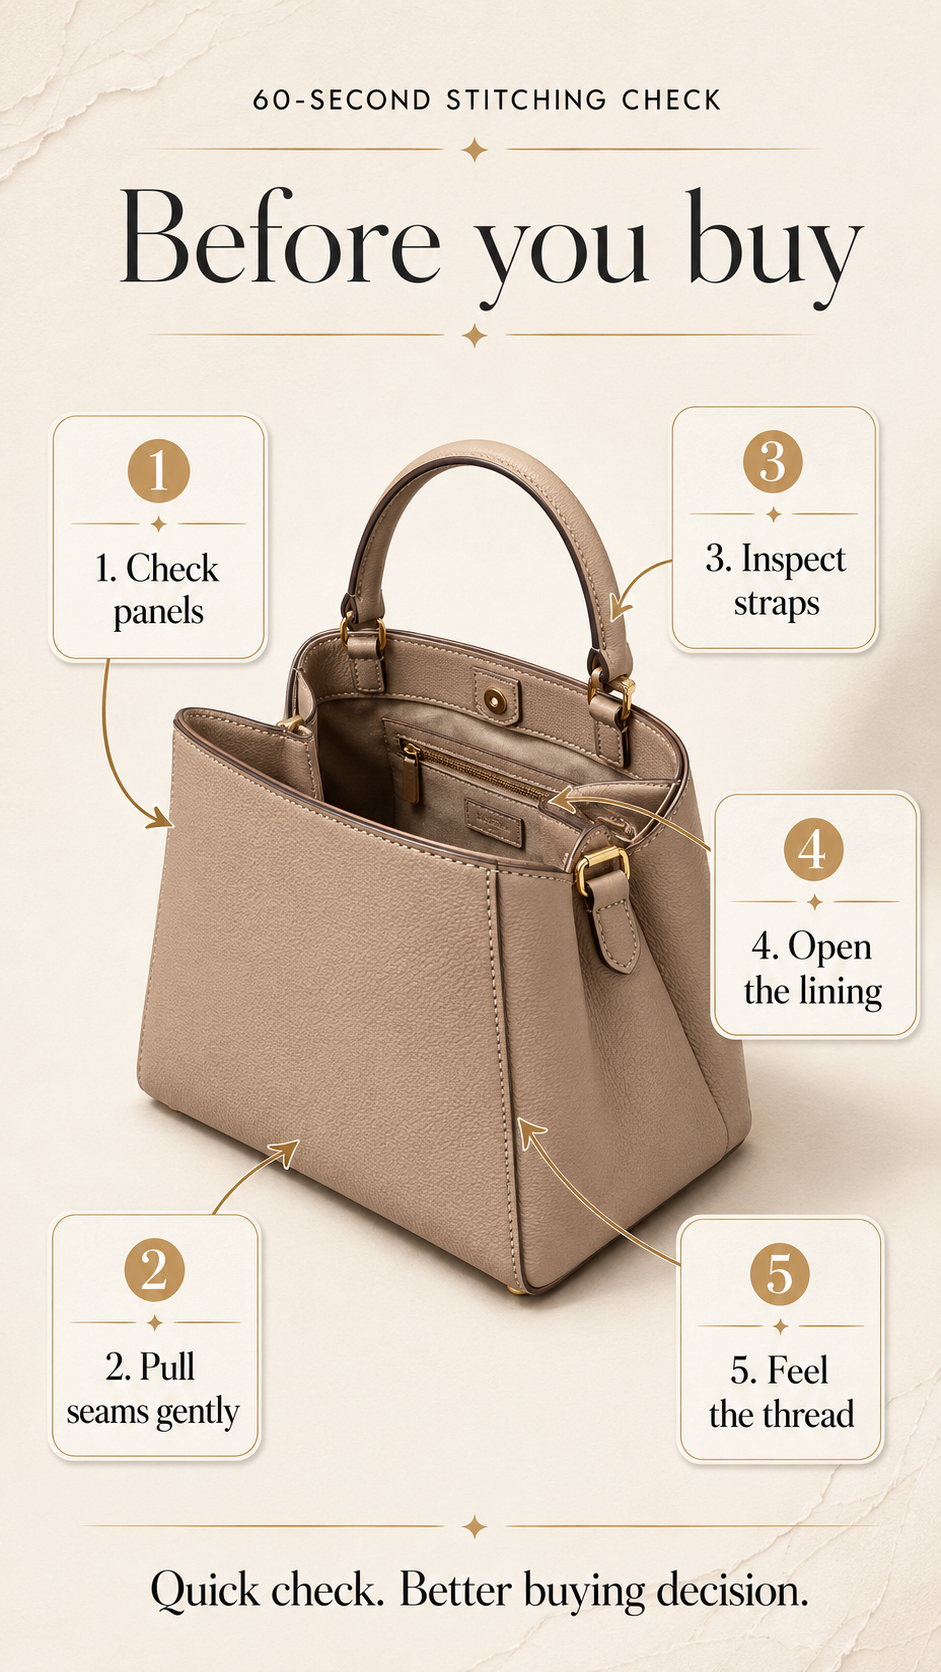
You can inspect most handbag stitching problems in one minute. This does not replace professional authentication, but it helps you avoid obvious construction issues before buying. Use good light and check both the outside and inside.
- Check the front and back panels: Look for straight, even stitch lines that follow the bag’s edges cleanly.
- Pull gently near the seams: Do not force it. Just check whether gaps open easily.
- Inspect handles and straps: Focus on attachment points, D-ring tabs, and buckle areas.
- Open the bag: Check lining seams, pocket stitching, and zipper pocket corners.
- Run your finger along the thread: Feel for loose, rough, raised, or snag-prone thread ends.
This quick method works well when browsing the LA GLOSSÉ shop or comparing different silhouettes side by side. Use the same inspection flow whether you are checking a refined shoulder bag, a satchel, a crossbody, or a larger tote.
Stitching Quality by Bag Type
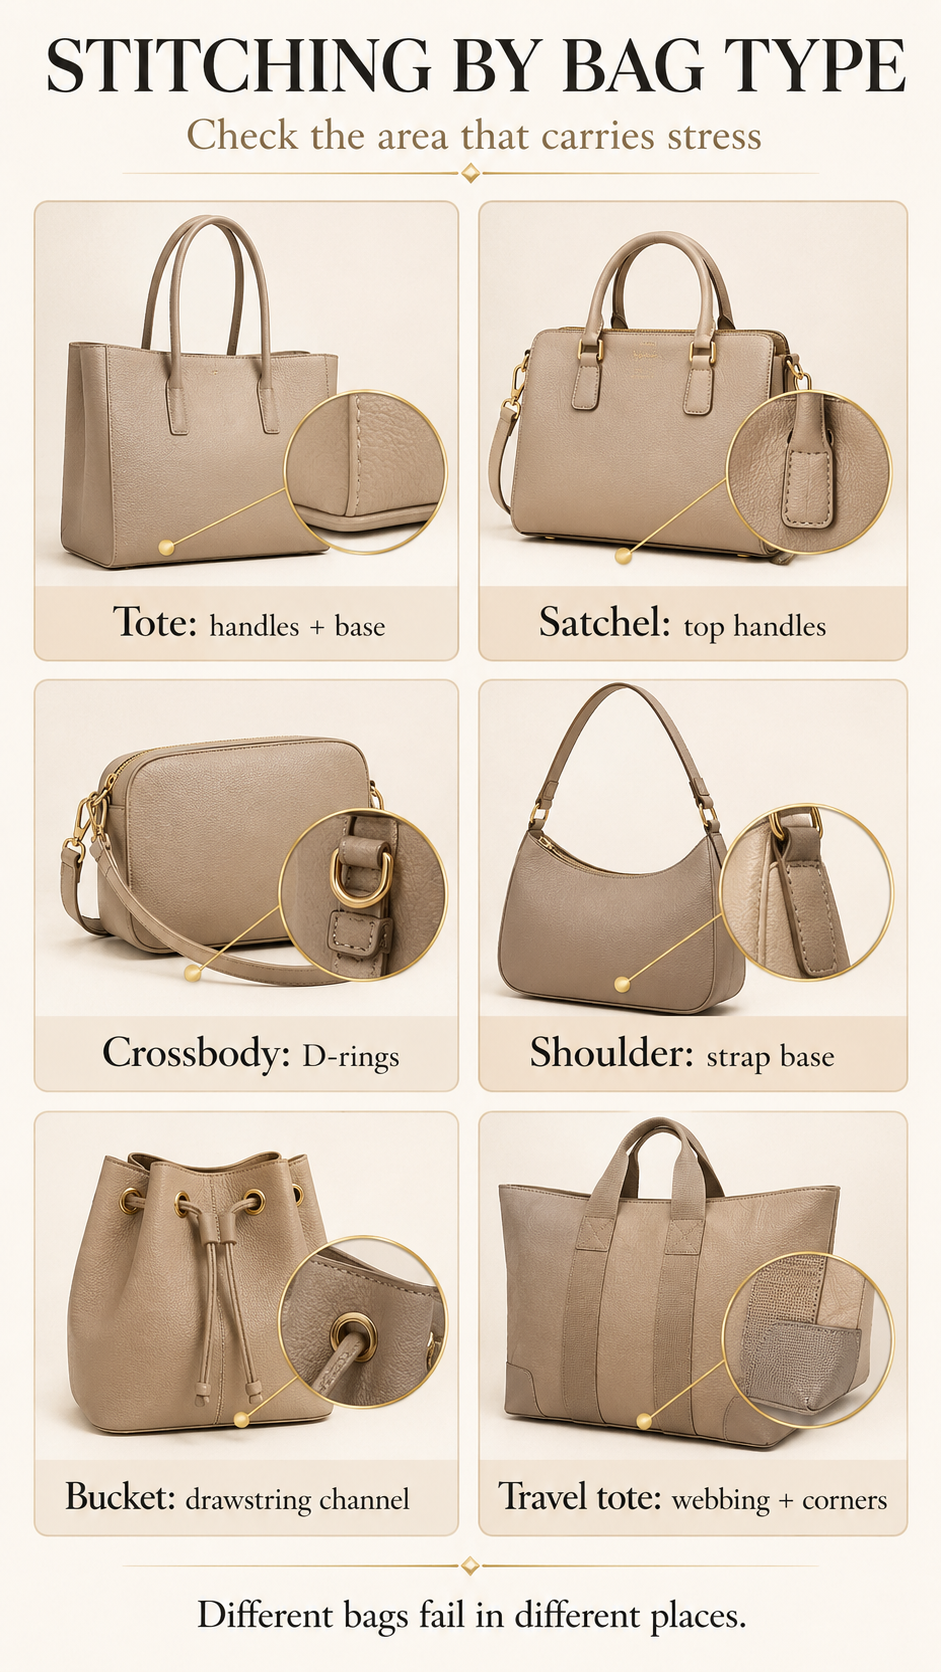
Different bag types fail in different places. A structured tote often fails at handle anchors or bottom corners. A soft fabric bag may fail where raw edges fray inside. A crossbody bag depends heavily on strap tabs, D-rings, and buckle areas. A shoulder bag needs strong top-edge and strap-base stitching.
For example, when checking a structured satchel such as the Lunera Elegant Satchel Handbag, the top handles, side panels, and base seams deserve close attention. For a softer silhouette like the Lunera Classic Hobo Bag, the shoulder strap base and side seam flexibility matter more.
A bucket bag such as the Noemi Charm Bucket Bag should be inspected around the drawstring channel and side seams, while a compact shoulder shape like the Korean Retro Underarm Shoulder Bag needs close checking around the strap base and upper edge.
| Bag Type | Most Important Stitching Area | What to Check First |
|---|---|---|
| Structured tote | Handle attachments and bottom seams | Handle bases, corner seams, base shape support. |
| Satchel bag | Top handles, zipper area, side panels | Handle roots, zipper tape, clean side seams. |
| Crossbody bag | D-ring tabs and strap connection points | Loop strength, buckle fold, tab stitching. |
| Shoulder bag | Shoulder strap base and top edge | No stretching, no loose edge stitching. |
| Bucket bag | Drawstring channel and side seams | Channel stitching, side seam tension, lining attachment. |
| Travel tote or duffle | Webbing, base corners, zipper ends | Reinforced straps, strong bottom construction, smooth zipper line. |
Contrast Stitching vs Tonal Stitching
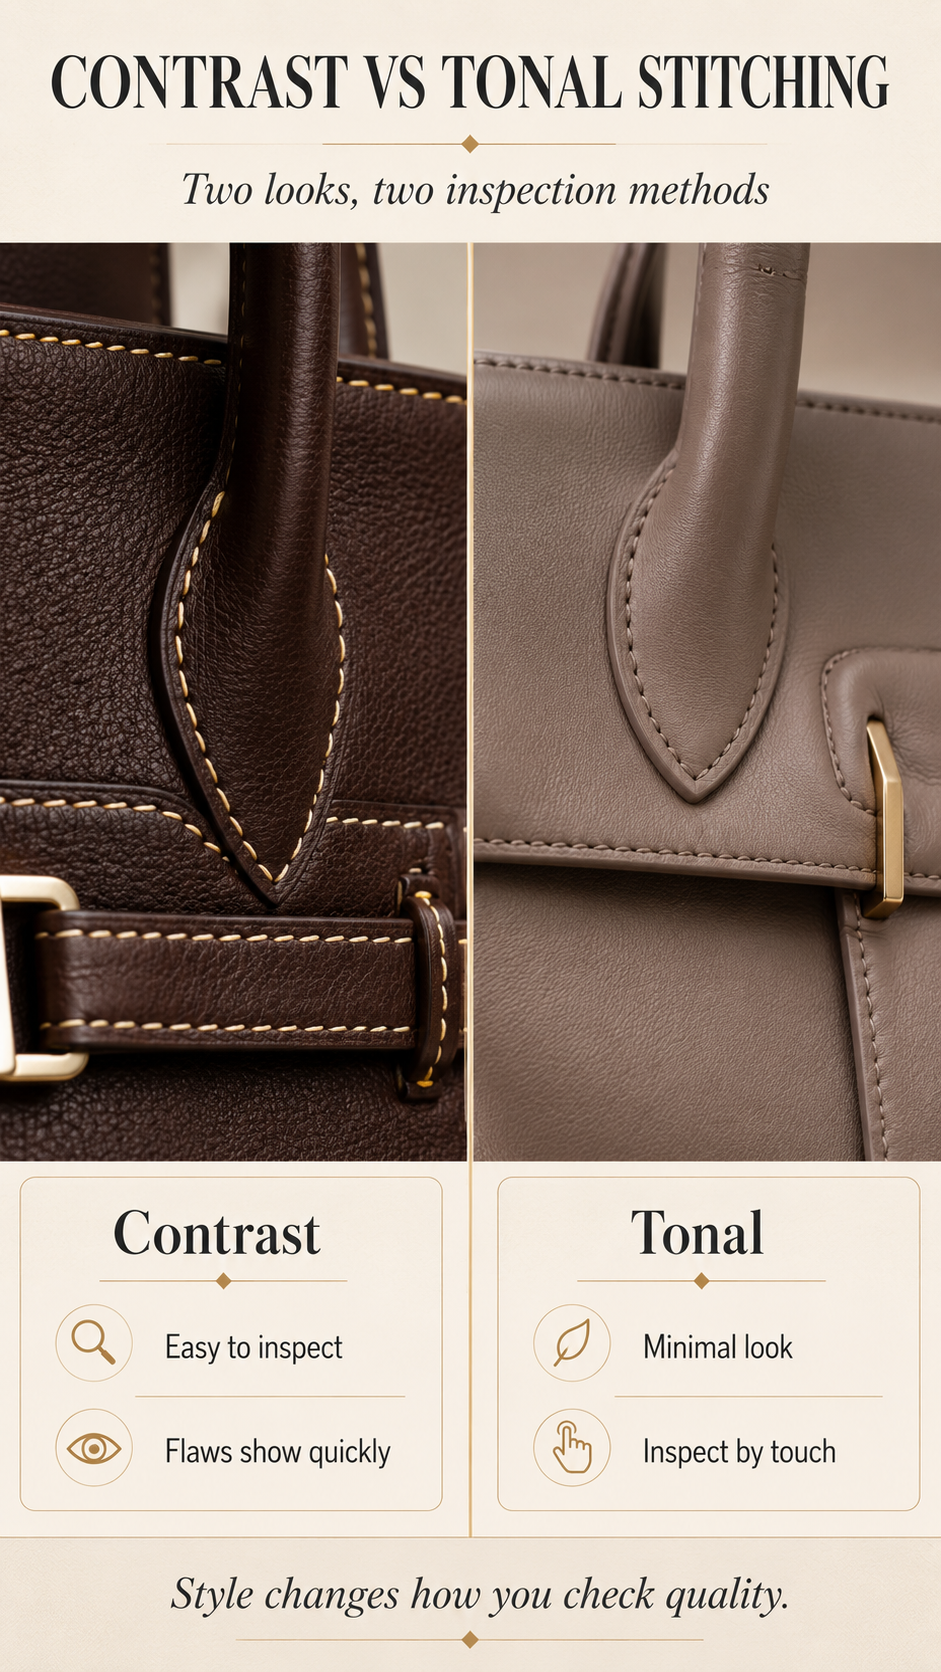
Contrast stitching and tonal stitching are both valid design choices. Contrast stitching is easier to inspect because the thread stands out against the material. Any crooked line, uneven spacing, or skipped stitch becomes visible quickly. This style often suits heritage, rugged, or classic leather designs.
Tonal stitching blends into the bag and gives a cleaner, more minimalist look. It is common on sleek, quiet-luxury styles because it lets the shape and material speak first. The downside is that tonal thread can hide small defects, so you should inspect it more carefully by touch. Run your finger along the seam and gently check for loose tension.
On quilted bags, stitching also becomes part of the design. A piece like the Diamond Quilted Korean Messenger Bag should be checked for consistent quilt lines, while a cleaner shoulder silhouette like the Marella Buckle Leather Shoulder Bag benefits from a closer tactile check if the stitching blends into the material.
| Thread Style | Best For | Inspection Tip |
|---|---|---|
| Contrast stitching | Heritage, rugged, vintage, workwear-inspired bags. | Use a visual scan; crooked lines are easier to spot. |
| Tonal stitching | Sleek, minimalist, formal, quiet-luxury bags. | Use a tactile scan; feel for raised loops, bumps, or loose areas. |
When Poor Stitching Is a Dealbreaker
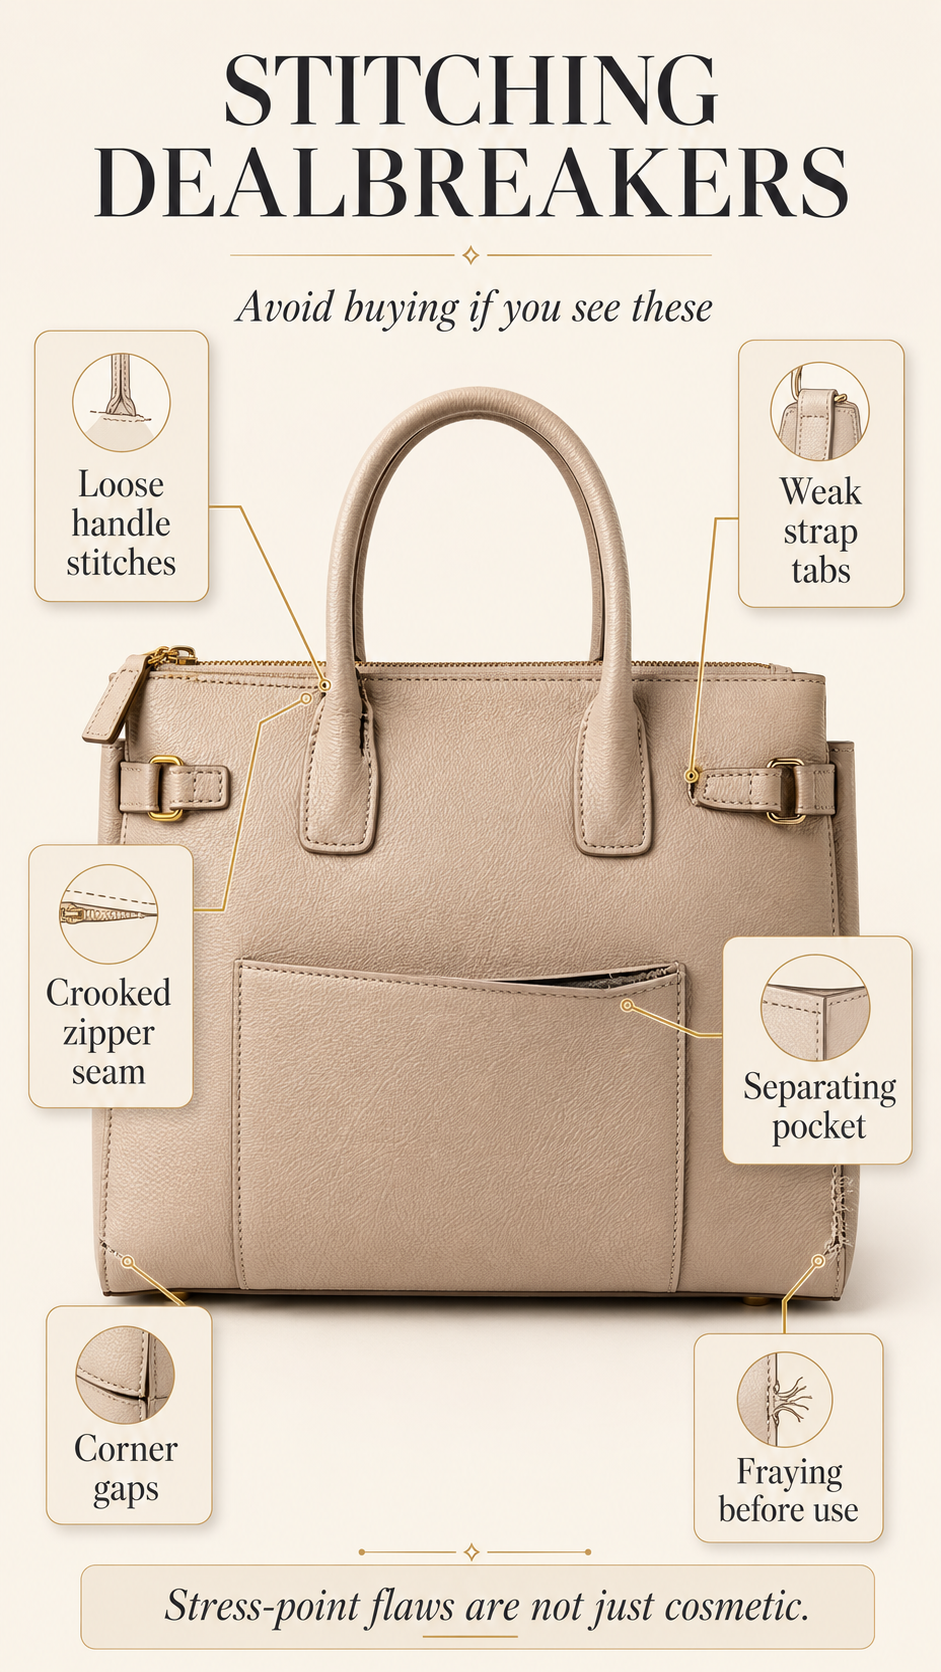
A small thread tail hidden inside the lining is not always a reason to reject a bag. But structural defects around handles, strap tabs, zipper ends, side seams, or bottom corners are different. Those areas carry movement, friction, and weight. If they already look weak on the shelf, daily use will usually make the problem more visible.
- Loose handle stitches: handles may weaken under daily carrying weight.
- Weak strap tabs: crossbody or shoulder straps may pull away from the body.
- Crooked zipper stitching: the zipper may catch, wave, or sit unevenly.
- Separating lining pocket seams: interior pockets can rip quickly during use.
- Corner thread gaps: base corners may split when the bag is full.
- Fraying threads before use: the bag is already showing early finishing weakness.
If you are comparing a compact crossbody such as the Top Band Crossbody, a phone-size bag like the Minicat RFID Mini Crossbody Phone Bag, or a larger shoulder option like the Calvin Klein Holt Drawstring Crossbody Bag, do not ignore weak strap tabs. Small bags still carry daily movement, and strap failure can happen even when the bag is not large.
Final Buying Advice
Stitching is not the only quality factor in a handbag. Material, lining, hardware, zipper quality, edge finishing, weight balance, and overall construction all matter. But stitching is one of the easiest details to inspect quickly before buying.
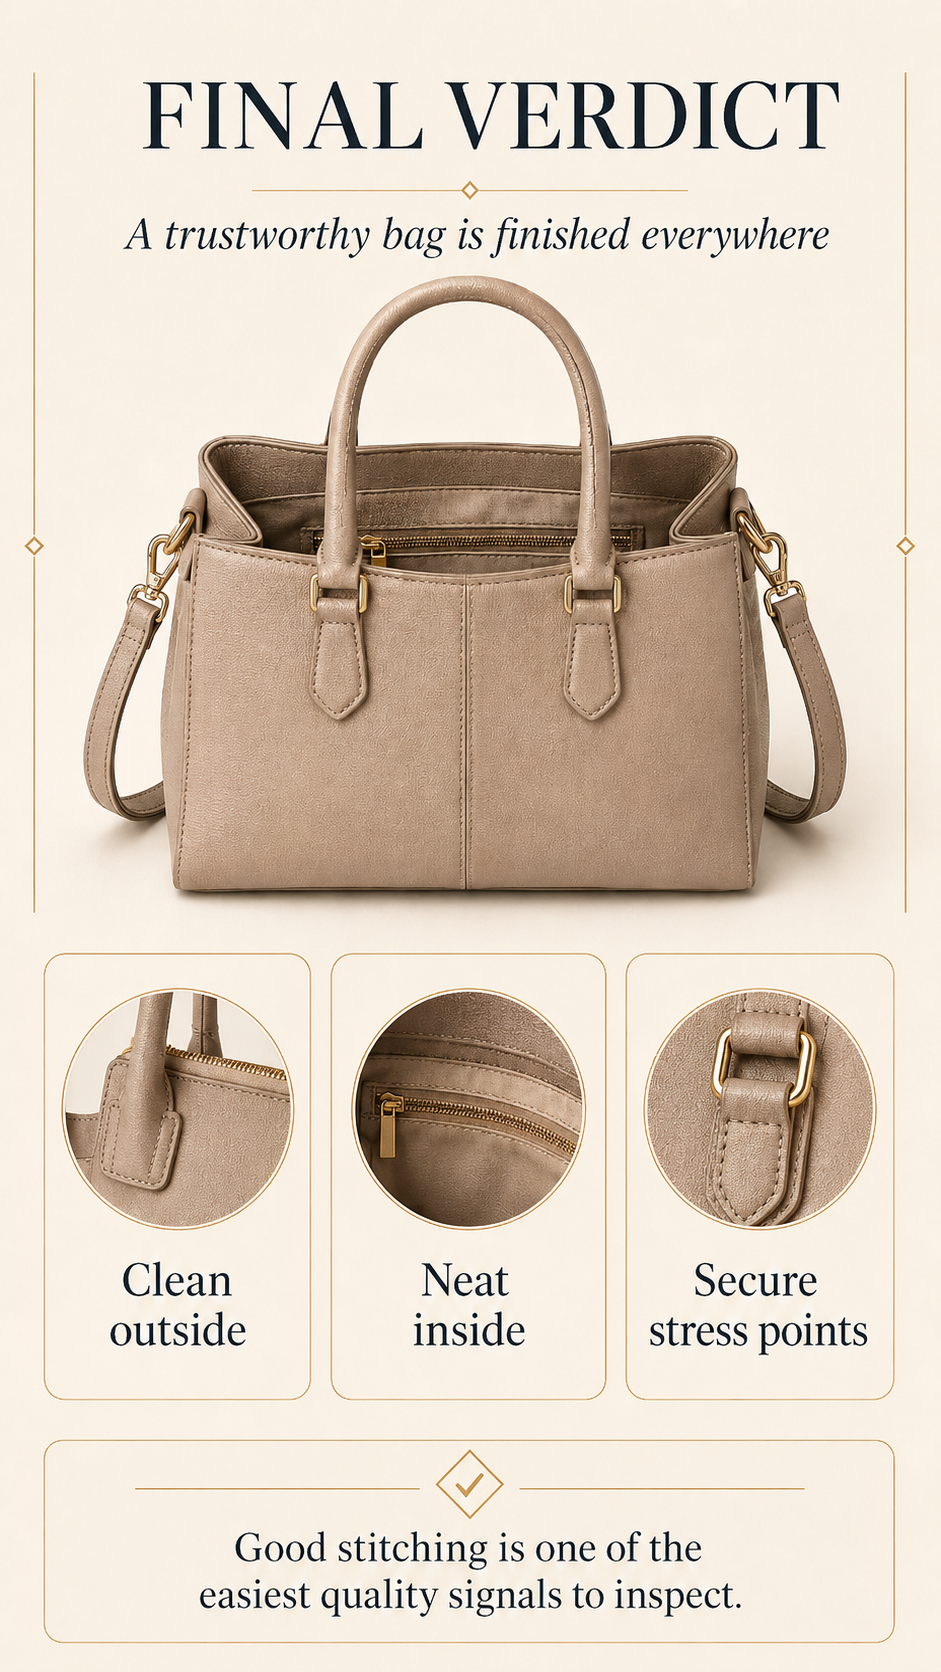
A trustworthy handbag should look considered from the outside, inside, and stress points. The exterior seams should be clean and controlled. The interior lining should be neatly finished. The handles, straps, zipper ends, and base corners should feel secure enough for the way you plan to use the bag.
Before choosing a new everyday bag, inspect the stitching first and then compare the style, size, and use case. A polished satchel, a relaxed hobo, a compact crossbody, or a travel tote can all be good choices when the stitching matches the material and the stress points feel secure.
FAQ: Handbag Stitching Quality
How can I tell if handbag stitching is good?
Good handbag stitching usually looks consistent, straight, secure, and balanced. Check whether the stitch line follows the edge cleanly, whether the spacing looks even, and whether the thread sits flat without loops, puckering, or skipped areas.
Is uneven stitching always a bad sign?
Not always. Some handmade leather stitching can have a natural angled rhythm. The problem is random unevenness: crooked paths, mixed stitch lengths, skipped holes, or loose tension. Consistency matters more than machine-perfect appearance.
Why are handle stitches important?
Handle stitches carry the weight of the bag. If handle bases or strap tabs are loose, the bag may stretch, tear, or fail under daily use. Always inspect handle roots, D-ring tabs, buckle folds, and strap attachment points first.
Should I worry about loose threads on a new bag?
A single small thread tail inside the lining may be a minor finishing issue if the seam is locked. But loose loops, skipped stitches, fraying thread, or messy thread tangles near stress points are warning signs.
What stitching areas should I check first?
Start with the handles and strap tabs, then check side seams, bottom corners, zipper tape, zipper ends, and interior pocket seams. These areas face the most movement, friction, and pulling force.
Does good stitching mean the bag is high quality?
Good stitching is a strong quality signal, but it is not the only factor. A high-quality bag should also have suitable material, clean lining, durable hardware, smooth zippers, neat edge finishing, and balanced construction.
Is contrast stitching better or worse?
Contrast stitching is not automatically better, but it is easier to inspect because flaws are more visible. Tonal stitching gives a cleaner minimalist look, but you should inspect it more carefully by touch.
Can poor stitching be repaired?
Some loose seams or detached lining pockets can be repaired by a professional cobbler or leather repair specialist. But if the material itself is torn along the stitch holes, repair can be difficult, costly, or visually noticeable.